Chatswood to Epping Station
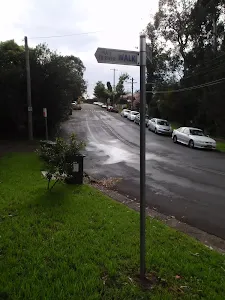


(0km) Chatswood Station → Int. Edgar St and Edgar St Reserve Trk
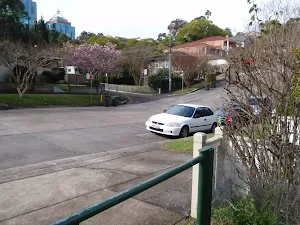
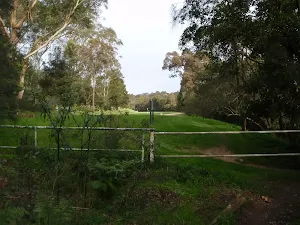
Turn right: From the intersection, this walk heads north up the Pacific Highway, to turn left onto Western Way. The walk continues down Western Way through a dogleg, turning right onto Jenkins Rd then quickly left back onto Western Way. The walk heads down Western Way to turn right onto Edgar St and to the Edgar Reserve Park with green gate.
(1km) Int. Edgar St and Edgar St Reserve Trk → Int. Park Ave and Edgar St Reserve Trk
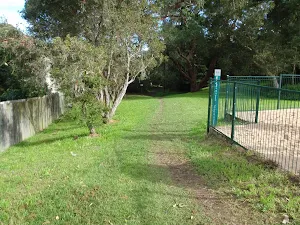
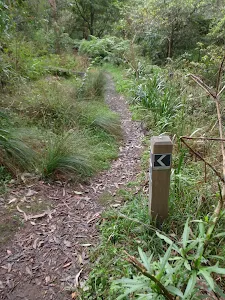
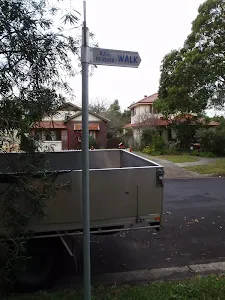
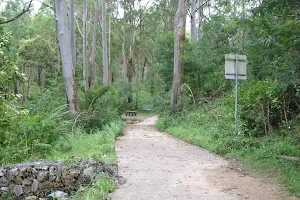
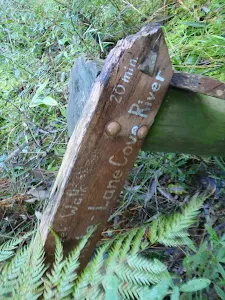
Continue straight: From the intersection, the walk heads between the tennis court fence on your right and the houses on your left for approximately 150m. The track then comes to an intersection with Park Ave, and a 'Rail to River Walk' sign[1].
(1km) Int. Park Ave and Edgar St Reserve Trk → Int. Park Ave and Rail to River Trk
(1km) Int. Park Ave and Rail to River Trk → Harnett Pl sign post
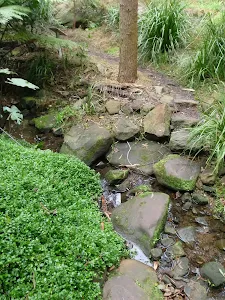
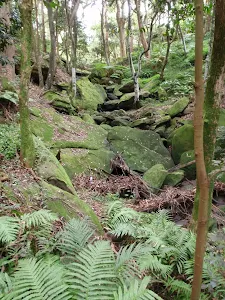
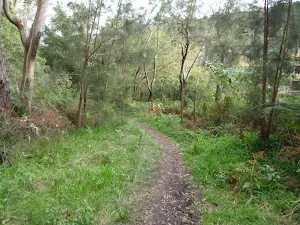
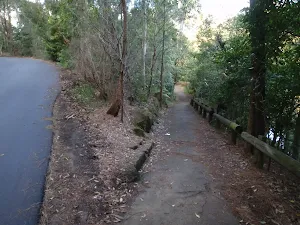
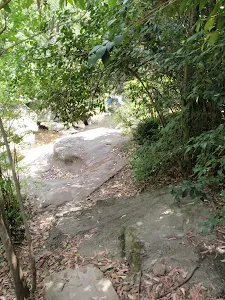
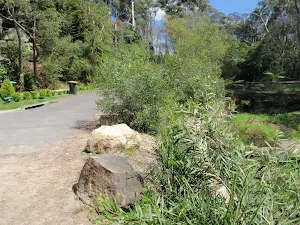
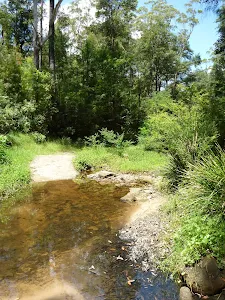
Continue straight: From the intersection, the walk follows the creek (which remains on your left) down the gully for approximately 100m to the signposted intersection.
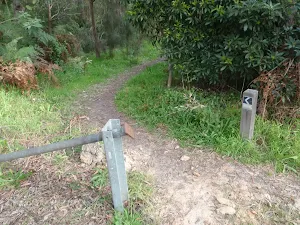
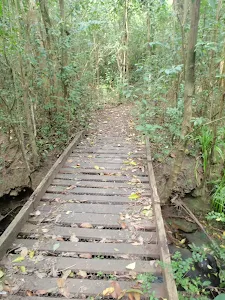
Veer right: From the intersection, the walk heads along the creek (which remains on the left) for approximately 60m to turn up the steps to a signposted intersection.
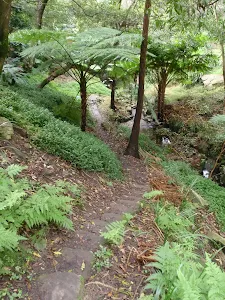
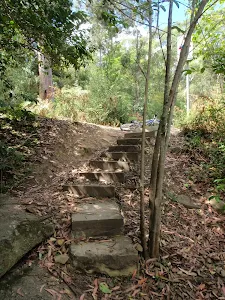
Turn right: From the intersection, this walk follows the 'Rail to River Walk' sign up the hill. The track zigzags up through mossy rock outcrops to a house on the left. This walk continues up the stairs to the intersection with the road.
(1km) Harnett Pl sign post → Int. Hawthorne Ave and Bellevue Ave
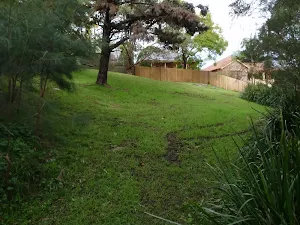
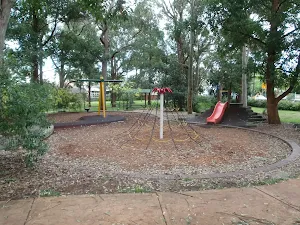
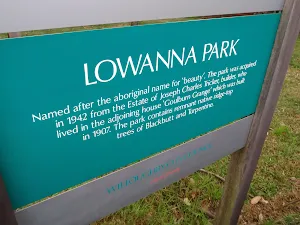
Turn left: From the gate on Greville St, this walk passes through the park diagonally, past the play equipment and BBQs, to the gate on the Fullers Rd side of Lowanna Park.
Turn left: From Lowanna Park, this walk heads along Fullers Rd towards the mechanics, initially keeping the park on the left. The walk continues along Fullers Rd, as Millwood Ave breaks off to the right. The first left is the signposted intersection with Bellevue Ave.
Turn left: From the intersection, this walk follows the 'Rail to River Walk' signs down Bellevue Ave for approximately 500m, tending right to the signposted intersection.
(3km) Int. Hawthorne Ave and Bellevue Ave → Int. Rail to River Trk and Hawthorne Ave
(3km) Int. Rail to River Trk and Hawthorne Ave → Eastern side of O.H. Reid Memorial Oval
(3km) Eastern side of O.H. Reid Memorial Oval → O.H. Reid Memorial Oval car park
(3km) O.H. Reid Memorial Oval car park → Int. Rail to River Trk and Reid Drive
(3km) Int. Rail to River Trk and Reid Drive → Lady Game Dr opp. Fullers Park
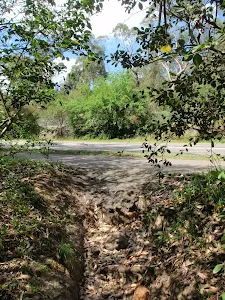
Veer right: From the intersection, this walk heads away from the golf course, following the Lane Cove River (on the left of the track). The walk continues under the river bank's shady vegetation for a short time to the intersection of Delhi Rd and Lady Game Dr.
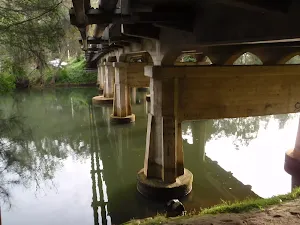
Turn sharp left: From the intersection, this walk heads down (away from the road) and under Fullers Bridge, then comes up the other side to meet the footpath next to Lady Game Drive, opposite Fullers Park.
(4km) Lady Game Dr opp. Fullers Park → Max Allen Drive Bridge
(4km) Max Allen Drive Bridge → Int. National Parks Office Trk and Max Allen Dr
(4km) Int. National Parks Office Trk and Max Allen Dr → Jenkins Hill
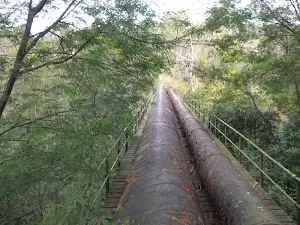
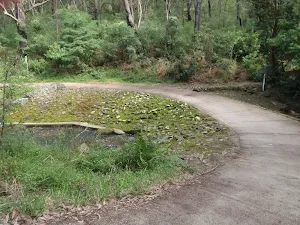
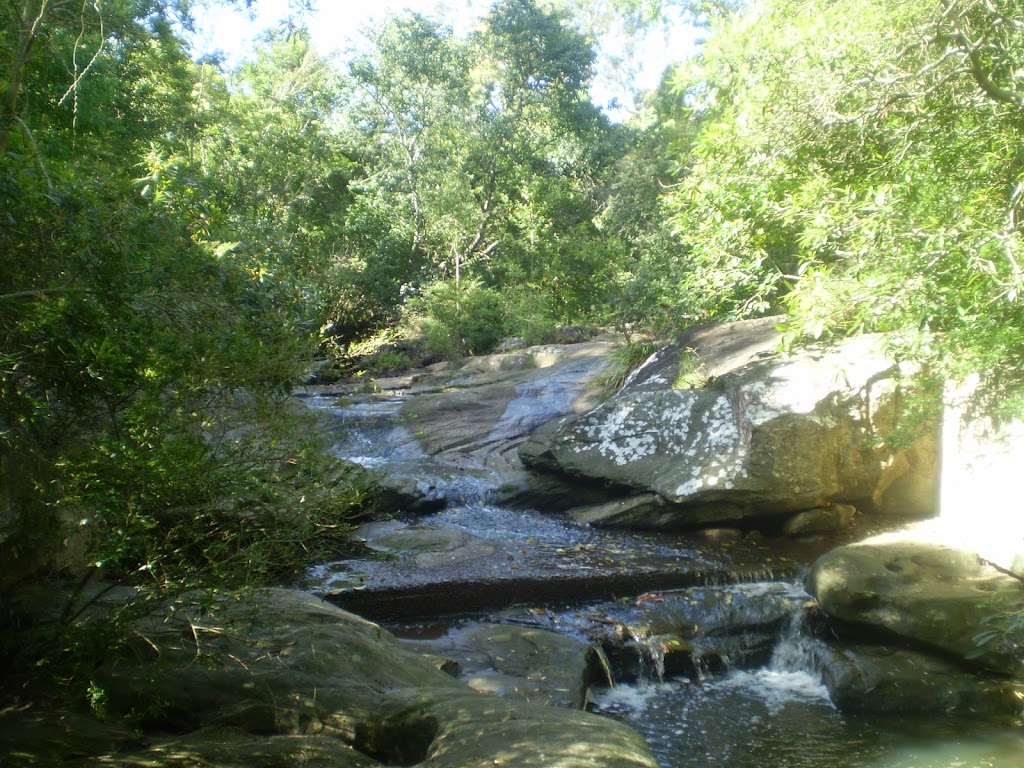
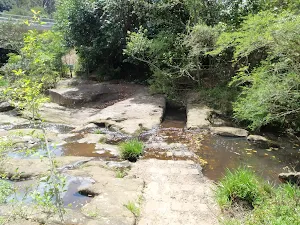
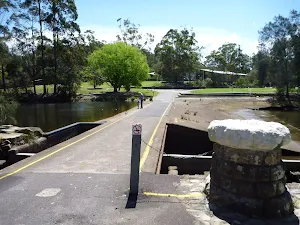
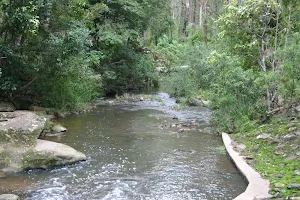
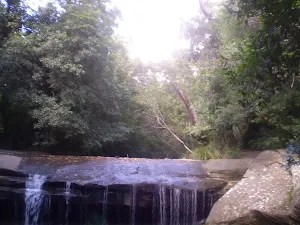
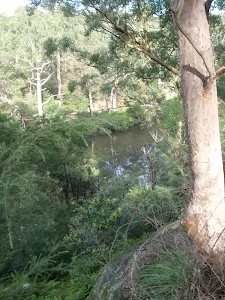
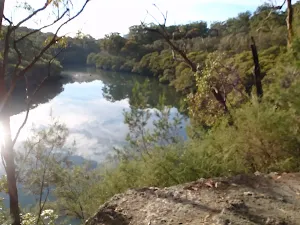
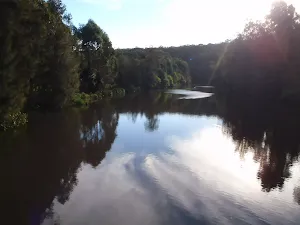
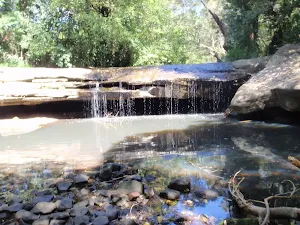
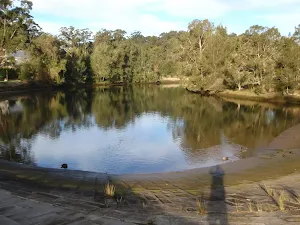
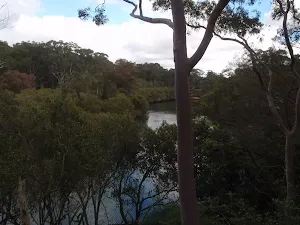
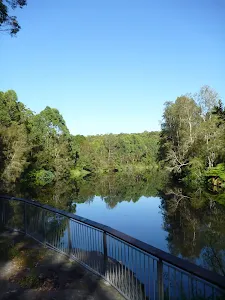
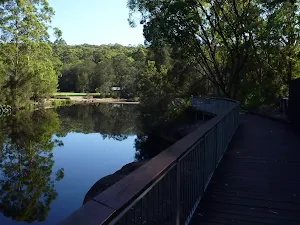
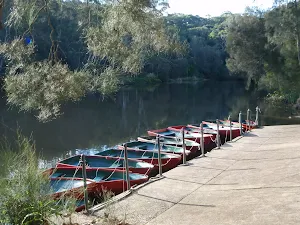
Lane Cove Weir
(4km) Jenkins Hill → Int. Max Allen Dr and Jenkins Hill Trk
Veer left: From the intersection, this walk heads away from the clearing and past the toilet block on the right. The walk heads across and up the hill for approximately 50m to the intersection with the road.
(4km) Int. Max Allen Dr and Jenkins Hill Trk → Int. Opposite Bakers Flat
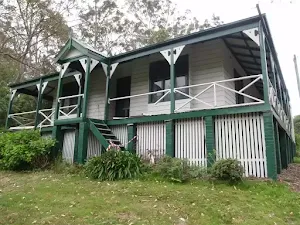
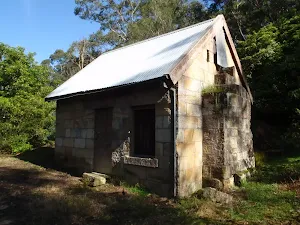
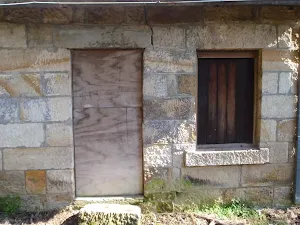
(4km) Int. Opposite Bakers Flat → Baker's Cottage
Baker's Cottage
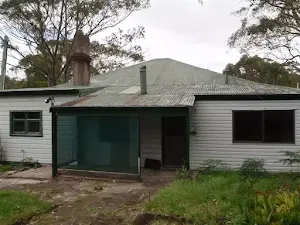
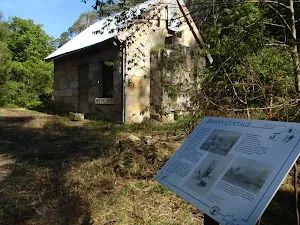
(4km) Int. Opposite Bakers Flat → Schwartz Homestead
Schwartz Homestead
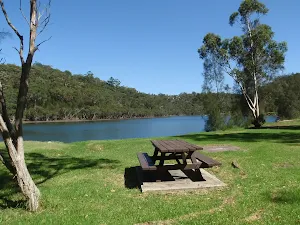
(5km) Schwartz Homestead → Thistlethwaytes Picnic Area
(5km) Thistlethwaytes Picnic Area → Bottom of Fiddens Wharf Oval Trk
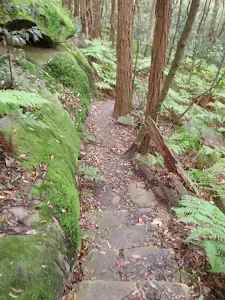
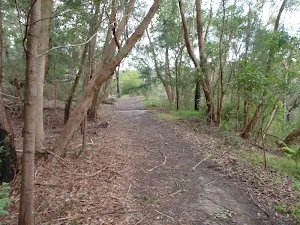
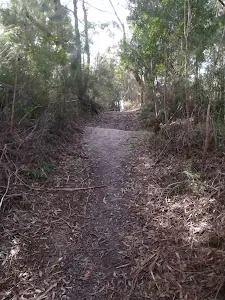
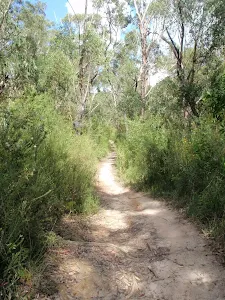
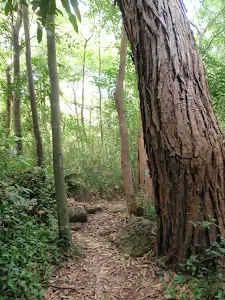
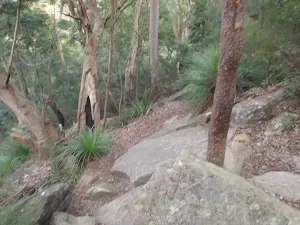
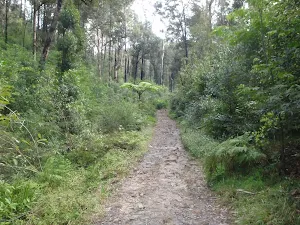
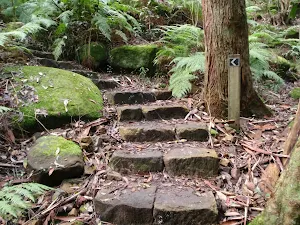
Continue straight: From the intersection, this walk follows the upper arrow on the historic walk sign post[11], gently uphill along the wide trail. The trail leads through the casuarina forest[12] for about 30m then passes the 'Scribbly Gum' information sign[13]. The trail then bends left and leads downhill, narrowing significantly[14]. Here the track heads down a series of timber steps[15] to pass a 'Sydney Red Gum' information sign[16]. The track then crosses the ferny gully and passes the 'Sandstone Gully Community'[17] and then the 'Sydney Peppermint'[18] information signs. From here, the track leads across another gully[19] then up and along the side of a steep hill (with an unfenced cliff to your left[20]) for about 70m, coming to a rock platform with a 'Blackbutts' information sign[21]. Here the walk leads down the staircase[22] and stone path for a short time and crosses the 'weedy'[23][24] creek on a short timber boardwalk[25]. The now flat track leads for another 50m to a signposted intersection (with some steps on your right), where a 'Visitor Centre Loop' sign[26] points back along the track.
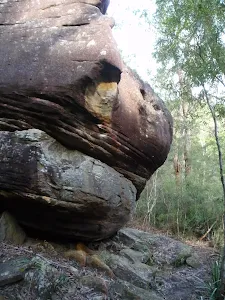
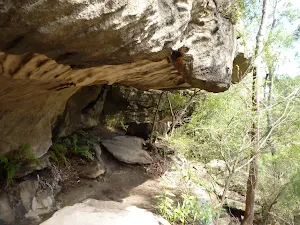
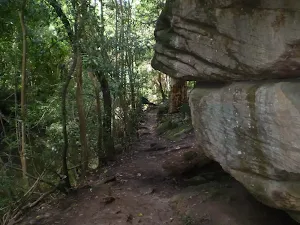
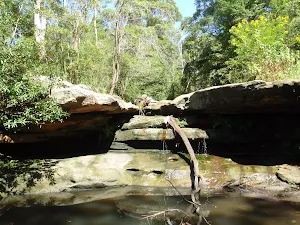
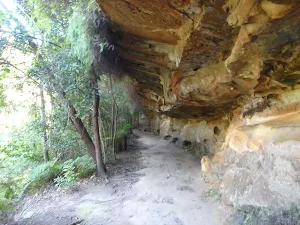
(6km) Fiddens Wharf Oval Trk → Sandstone caves
Sandstone caves
(8km) Sandstone caves → Int. Great North Walk and Blue Hole Trk
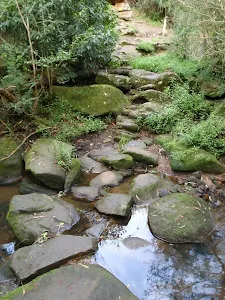
Veer left: From the intersection, the walk follows the 'Great North Walk - Deburghs Bridge' sign[66] downhill along the wide management trail. The trail soon bends right and follows the power lines[67] down, stepping over a partially buried, green metal pipeline[68] (sometimes hissing[69]). After this, the trail follows a GNW arrow[70] left as the trail significantly narrows and leads down a series of timbers steps[71] then across the rocky Blackbutt Creek[72][73]. Here, the walk follows the GNW arrow up onto the rock platform[74], where the track turns left then leads along the flat to a T-intersection with a GNW arrow post[75], and a set of steps[76] (up to your right AND down to your left).
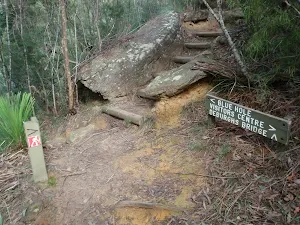
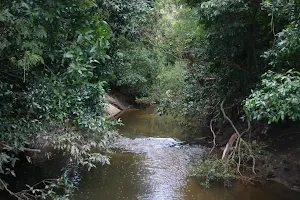
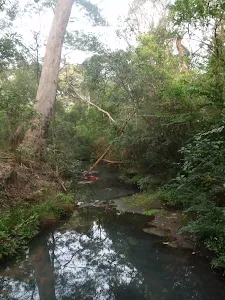
(8km) Int. Great North Walk and Blue Hole Trk → Blue Hole
Blue Hole
(8km) Int. Great North Walk and Blue Hole Trk → Int of GNW and Gloucester Ave fire trail
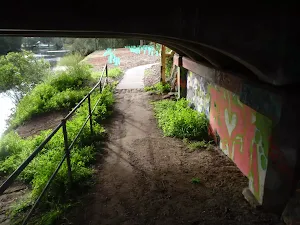
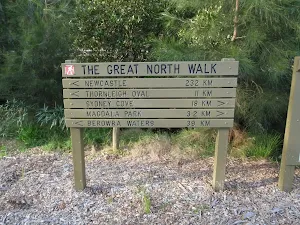
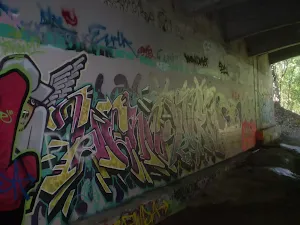
Continue straight: From the intersection, this walk follows the 'Thornleigh via Great North Walk' sign[87] down a couple of steps[88] and along the track towards Deburghs Bridge, keeping the valley to your left. After about 50m, the track leads under the large concrete Deburghs Bridge[89], with some graffiti[90]. On the other side of the bridge, the track bends right to head up over some rocks, following two sections of hand railing[91][92]. From the end of these handrails, the track leads gently up among the grass trees[93] for about 400m (and a weedy section of track) to come to a clear T-intersection[94] with a management trail, where a 'Great North Walk' sign[95] points back down the track.
Continue straight: From the intersection, this walk follows the 'The Great North Walk' sign[96] north, gently downhill along the management trail. After about 80m, this trail crosses a concrete bridge[97] over Rudder Creek (beside a concrete sewerage pipe[98]). From here, the trail leads uphill for just shy of 200m to come to an intersection with the GNW track (on your left), where a 'Lane Cove Weir' sign[99] points back down along the trail.
Turn left: From the intersection, this walk follows the 'Thornleigh Oval' sign[100] west, gently down the track, away from the management trail. The track almost immediately passes the large metal pipe (crossing the Lane Cove River[101]) then winds down the rocky track[102] for about 200m, through open eucalypt forest[103] with some limited views left over the valley, to come to a weedy section of track marked with a concrete sewerage access point[104]. Here the track mostly flattens out and leads along the side of the hill for about 400m to head down a few steps and cross Quarry Creek[105]. The walk then heads up some steps and follows the track for another 30m to come to a T-intersection[106] with the Gloucester Ave fire trail, marked with a GNW and NPWS arrow post[107].
(10km) Int of GNW and Gloucester Ave fire trail (east) → Int of GNW and Gloucester Ave service trail (sth)
(10km) Int of GNW and Gloucester Ave service trail (sth) → Int of the Great North Walk and the West Pymble service trail link track
Continue straight: From the green shed, this walk follows the track[116] along the side of the hill, keeping the valley to your left (running parallel with the high tension power lines, up to your right). After about 150m, this walk comes to an intersection with a faint track on your right (that leads a short distance to a management trail), marked with a GNW arrow post[117].
Continue straight: From the intersection, this walk follows the GNW arrow post along the mostly flat track, through the dense forest, and almost immediately passes a concrete sewerage access point[118]. After about 70m, this walk heads down a few timbers steps to cross a small gully[119], where the track continues for another 100m (passing close to a few houses[120]), then crosses two flat timber bridges[121] over Congham Creek. Here the walk veers left up onto the rock platform[122] and follows the track gently uphill for another 80m to come to a three-way intersection, marked with a GNW arrow post[123] (and a sign pointing left to 'Marsfield'[124]).
Veer right: From the intersection, the walk follows the GNW arrow post[125] north, uphill for about 30m to come to a faint intersection with a track (on your right) marked with a GNW arrow post[126].
Veer left: From the intersection, this walk follows the GNW arrow post[127] gently uphill along the side of the hill (keeping the valley to your left) for about 100m to come to a small clearing and three way intersection, marked with yet another GNW arrow post[128] and a pile of rocks[129] (on your left).
Turn left : From the intersection, this walk follows the GNW arrow post[130] up the short rocky hill[131] and away from the high tension power lines[132]. The track (rocky early on[133]) leads along the side of the hill among some grass trees[134] for about 300m before passing under the power lines again. Here the track continues for another 300m along the side of the valley to come to a clear intersection with intersection with a wide management trail[135].
(11km) Int of the GNW and the West Pymble service trail link track → Int of the GNW and the Avondale creek service trail
(11km) Int of the GNW and the Avondale creek service trail → Int of the GNW and the South Turramurra High School trail
Continue straight: From the intersection, this walk heads gently uphill following the main track, whilst keeping the valley to your left for about 30m to come to a clear Y-intersection marked with a GNW arrow post[144].
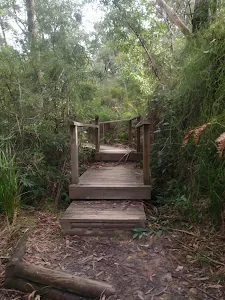
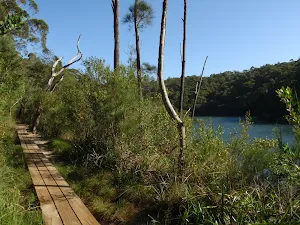
Veer left: From the intersection, this walk follows the GNW arrow post[145] along the track, keeping the Lane Cove River a short distance to your left[146]. After about 80m, the track steps up to and crosses a short section to timber boardwalk/bridge[147]. Here the walk climbs up the rocky hill following a series of concrete access points[148] and timber steps[149] for about 230m to come to a T-intersection with a management trail, marked with a GNW arrow post[150].
(12km) Int of the GNW and the Turramurra High School service trail → Browns Waterhole int
Continue straight: From the intersection just below the Koombalah Ave gate, this walk follows the management trail gently downhill, whilst keeping the valley to your left. The trail initially leads over a rock platform, then about 50m later, leads down a steep hill[153]. The trail then heads gently down for about 400m before a short steep hill[154] leads down to a metal high tension power line tower[155]. Here the trail bends right and leads down and along the side of the hill for another 200m to pass another high tension power line tower[156] and head behind a few houses. Just behind the second house, this walk comes to ephemeral creek on a rock platform[157].
Continue straight: From here, this walk crosses the ephemeral creek[158] (keeping the houses up to your right) and continues along the trail for about 30m to come to a T-intersection with a wide, shared, concrete path, marked with several signposts[159].
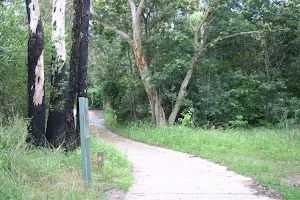
Turn left: From the intersection, this walk follows the GNW arrow post downhill[160] along the wide, shared, concrete path. After about 50m, this path leads under some high tension power lines[161] then bends right[162]. About 50m after passing under the power lines, this path leads to an intersection with a track[163] (on your left, that leads to an informal unfenced lookout), just before a GNW arrow post[164].
Continue straight: From the intersection, the walk heads fairly steeply downhill along the concrete path. The path passes a few signs[165] over about 100m, then comes to an intersection with a track (on your left), marked with a timber barricade and a GNW arrow post[166].
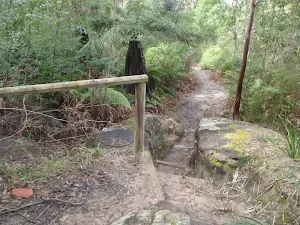
Veer right: From the intersection, this follows the concrete path downhill for just shy of 50m to come to a intersection with a dirt management trail[167]. This intersection is beside the Lane Cove River crossing[168] (on your left) and is marked with a 'The Great North Walk' sign here[169].
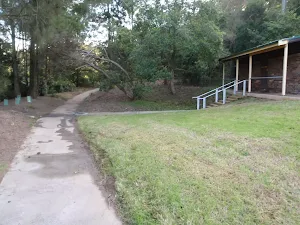
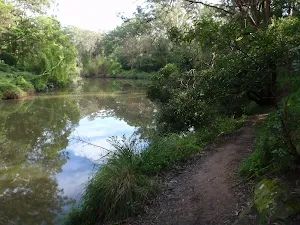
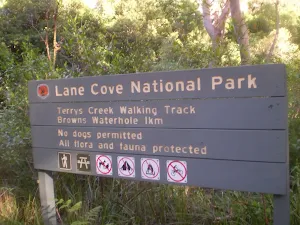
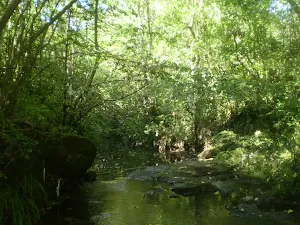
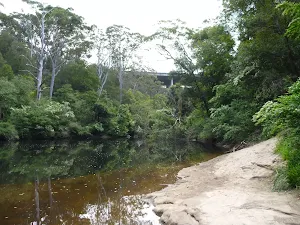
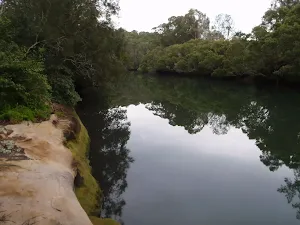
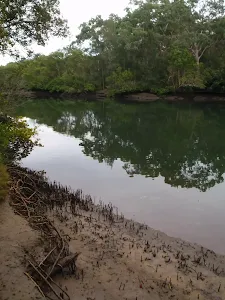
(13km) Browns Waterhole int → Browns Waterhole
Browns Waterhole
(13km) Browns Waterhole → Int of Terry's Creek Walking Track and Brown's Waterhole Servicetrail
(13km) Int of Terry's Creek Walking Track and Brown's Waterhole Servicetrail → Int of Eastwood Station and Pembroke street tracks
Continue straight: From the intersection the track follows the bushtrack south through the bush winding up some steps and crossing underneath the M2 moter way and back down and around to the signposted intersection of the Crimea road and Epping road tracks.
Turn right: From the intersection the tack follows the Epping road arrow down across the creek and up the other side to the signposted intersection of the Eastwood Station track at the number 18 plaque
Turn right: From the intersection the track follows the Eastwood Station arrow through the bush winding all the way along to a rock platform where you can see the M2 motorway and continues along the track, all the way through until it comes to the signposted intersection of the signposted intersection of the Eastwood Station track
Continue straight: From the intersection the track heads west through the bush winding down a gentle hill and around a sewage access point, coming back up the other side to the signposted intersection of the Eastwood Station track.
Turn left: From the intersection the track heads south, up the short hill and through the bush passing 2 sewage access points as it winds along the left hand side of the creek, all the way to the intersection of the Eastwood Station track, a short distance after passing the 3rd sewage access point.
Continue straight: From the intersection the track follows the bushtrack south alongside the creek, passing a sewage access point and continuing up a short hill to the intersection of the unnamed bushtrack.
Veer left: From the intersection the track heads south west along the bushtrack winding up and down along the left side of the creek until it crosses a small wooden bridge and continues through the bush, all the way to the intersection of the unnamed bushtrack.
Continue straight: From the intersection the track follows the Eastwood Station arrow along the creek and through the bush past signpost 15, and a sewage access point. continuing up a short hill to the intersection of the Epping road track.
Continue straight: From the intersection the track follows the bushtrack down the gentle hill, winding around and under the Epping road bridge and across the rocks until it comes to the intersection of the Pembroke road path and the Eastwood Station track at the base of the wooden steps.
(15km) Int of Eastwood Station and Pembroke street tracks → Int on Epping Rd east of Terrys Creek
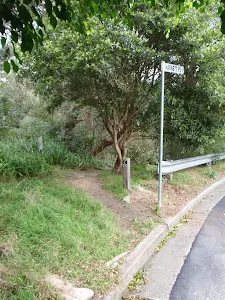
Turn left: From the intersection (marked with the no.13 post[172]) this walk follows the track uphill, towards the busy road (through the re-vegetating clearing) for about 30m to come to a T-intersection with a concrete path[173], beside Epping Road.
(15km) Int on Epping Rd east of Terrys Creek → End of Pembroke St
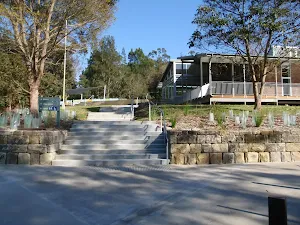
(15km) End of Pembroke street → Epping Station
Maps for the Chatswood to Epping Station walk
You can download the PDF for this walk to print a map.
These maps below cover the walk and the wider area around the walk, they are worth carrying for safety reasons.
| Parramatta River | 1:25 000 Map Series | 91303N PARRAMATTA RIVER | NSW-91303N |
| Sydney | 1:100 000 Map Series | 9130 SYDNEY | 9130 |
Cross sectional view of the Chatswood to Epping Station bushwalking track
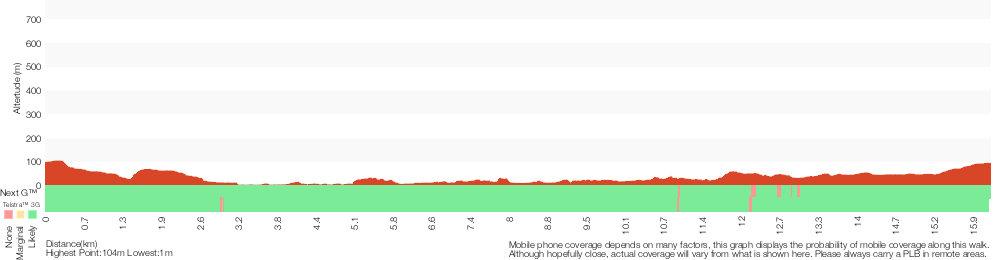
Analysis and summary of the altitude variation on the Chatswood to Epping Station

Overview of this walks grade – based on the AS 2156.1 – 2001
Under this standard, a walk is graded based on the most difficult section of the walk.
| Length | 16.3 km | ||
| Time | 6 hrs | ||
| . | |||
Grade 4/6 Hard track | AS 2156.1 | Gradient | Very steep (4/6) |
| Quality of track | Rough track, where fallen trees and other obstacles are likely (4/6) | ||
| Signs | Directional signs along the way (3/6) | ||
| Experience Required | Some bushwalking experience recommended (3/6) | ||
| Weather | Storms may impact on navigation and safety (3/6) | ||
| Infrastructure | Limited facilities, not all cliffs are fenced (3/6) |
Some more details of this walks Grading
Here is a bit more details explaining grading looking at sections of the walk
Gradient
7km of this walk has short steep hills and another 4.9km has gentle hills with occasional steps. Whilst another 4.7km is flat with no steps and the remaining 55m is very steep.
Quality of track
8km of this walk follows a formed track, with some branches and other obstacles and another 5km follows a smooth and hardened path. Whilst another 1.7km follows a clear and well formed track or trail and the remaining 960m follows a rough track, where fallen trees and other obstacles are likely.
Signs
Around 9km of this walk has directional signs at most intersection, whilst the remaining 7km is clearly signposted.
Experience Required
Around 13km of this walk requires no previous bushwalking experience, whilst the remaining 3.4km requires some bushwalking experience.
weather
Around 16km of this walk is not usually affected by severe weather events (that would unexpectedly impact safety and navigation), whilst the remaining 700m is affected by storms that may impact your navigation and safety.
Infrastructure
Around 8km of this walk is close to useful facilities (such as fenced cliffs and seats), whilst the remaining 8km has limited facilities (such as not all cliffs fenced).
Similar walks
A list of walks that share part of the track with the Chatswood to Epping Station walk.
Browns Waterhole Track
1.3 km One way, 30 mins
Moderate track
Baker's Cottage
1.5 km Return, 45 mins
Moderate track
Lane Cove National Park Heritage Walk
2.6 km One way, 1 Hr
Moderate track
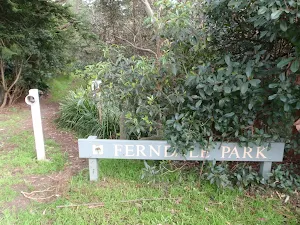
Ferndale Park Loop
3.3 km Circuit, 1 hr 30 mins
Moderate track
Epping to Eastwood Station (via Terrys Creek)
4.1 km One way, 1 hr 30 mins
Moderate track
Fiddens Wharf walking track
4.3 km Circuit, 1 hr 27 mins
Moderate track
Kissing Pt Rd to De Burghs Bridge
4.4 km One way, 1 hr 45 mins
Hard track
Vimeira Rd to De Burghs Bridge
5.1 km One way, 2 hrs
Hard track
Fairylands Loop Track
5.3 km Circuit, 2 hrs 30 mins
Hard track
Chatswood Station to Mowbray Park
5.4 km One way, 2 hrs
Hard track
Lane Cove Tourist Park to Baker's Cottage
5.9 km Return, 2 hrs 30 mins
Moderate track
De Burghs Bridge to Fullers Bridge
6 km One way, 2 hrs 30 mins
Hard track
Roseville to Chatswood Station via Lane Cove River
6 km One way, 2 hrs 30 mins
Hard track
Thornleigh to Marsfield
6.1 km One way, 2 hrs 30 mins
Hard track
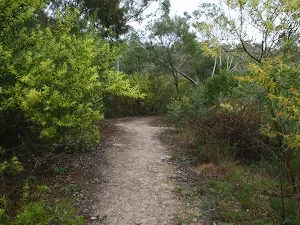
Rail to River Walk
7.5 km Circuit, 3 hrs
Hard track
Epping to Pennant Hills Station (via Lane Cove River)
8.4 km One way, 3 hrs 15 mins
Hard track
Epping Station Lane Cove River Loop
8.4 km Circuit, 3 hrs

Moderate track
Roseville to Macquarie Park
8.9 km One way, 3 hrs 30 mins
Hard track
De Burgs Bridge to Thornleigh station
9.7 km One way, 3 hrs 45 mins
Hard track
Epping to Eastwood Station (via Lane Cove River)
10.2 km One way, 3 hrs 45 mins
Moderate track
Eastwood to Thornleigh
10.3 km One way, 3 hrs 45 mins
Hard track
Gordon to Roseville Railway Station
10.7 km One way, 4 hrs 30 mins

Hard track
Rail to River and Stringybark Creek Reserve Walk
11.2 km Circuit, 4 hrs
Hard track
Macquarie Park to Thornleigh
11.6 km One way, 4 hrs 30 mins
Hard track
Epping to Gordon Station
11.7 km One way, 4 hrs 15 mins
Hard track
Lane Cove Tourist Park River Circuit
11.9 km Circuit, 5 hrs
Hard track
Gordon to Chatswood Station
12.2 km One way, 4 hrs 30 mins
Hard track
Gordon to Roseville Station (Riverside Walk)
13.3 km One way, 4 hrs 30 mins
Hard track
Chatswood Station to Eastwood Station
18.1 km One way, 6 hrs 45 mins
Hard track
Eastwood to Hornsby
20.6 km One way, 8 hrs
Hard track
Gordon to Hornsby (overnight at Scout camp)
25.8 km One way, 2 Days
Hard track
Sydney to Thornleigh via Lane Cove Tourist Park
33 km One way, 2 Days
Hard track
Circular Quay to Hornsby
44.4 km One way, 3 Days
Hard track
Other Nearby walks
A list of walks that start near the Chatswood to Epping Station walk.
Fairylands track
978 m Return, 30 mins
Easy track
Fullers Bridge to Epping Rd
2.6 km One way, 1 Hr

Hard track
Lane Cove Weir to Boat Shed
1.3 km Return, 1 Hr
Moderate track
Riverside Walk
5.3 km One way, 2 hrs
Hard track
Garadi Track
1.5 km Circuit, 1 Hr
Moderate track
Little Digger Track
2.2 km One way, 1 Hr
Moderate track
North Ryde Fairyland circuit
6.9 km Circuit, 2 hrs 30 mins
Hard track
Lane Cove Tourist Park to Boat Shed
3.4 km Return, 1 hr 30 mins
Moderate track
Two Creeks Track
6.1 km One way, 2 hrs 30 mins
Moderate track
Lindfield Park and Little Digger Track Loop
6.7 km Circuit, 2 hrs 45 mins
Moderate track
Little Digger Track to Davidson Reserve and Lyrebird Circuit
11.5 km One way, 4 hrs 30 mins
Hard track
North Arm Walking Track
3.1 km One way, 2 hrs

Moderate track
Plan your trip to and from the walk here
The Chatswood to Epping Station walk starts at the Chatswood Station (gps: -33.797073, 151.18037)
The Chatswood to Epping Station ends at the Epping Station (gps: -33.772518, 151.08242)
Weather Forecast
This walk starts in the Metropolitan weather district.
Current Alerts
Park Information
Lane Cove National Park
This small but picturesque city park is a haven of peaceful bushland along the winding Lane Cove River. Home to the Kukundi Wildlife Shelter and 27 km of the Great North Walk, you can also hire a boat, take a stroll or enjoy a picnic by the weir.
Bradley Reserve
Bradley Reserve is a large natural bushland area owned and managed by Ku-ring-gai council. The reserve extends from Lane Cove River to the end of Kissing Point Road north to George Christie playing fields. The reserve is home to the locally well know STEP track, and is cared for by the STEP inc, the "South Turramurra Environment Protection". The Great north walk also heads through this reserve, and is also home to Browns water hole.
Comments
Short URL: http://wild.tl/ctes