Katoomba to Wentworth Falls via the Jamison Valley
* This walk passes through very remote areas and sections have no visible track. At least one person in your group should have training and experience in off track walking and navigation. Even with these notes and a GPS these extra skills and equipment are required.

Free Beacon Hire

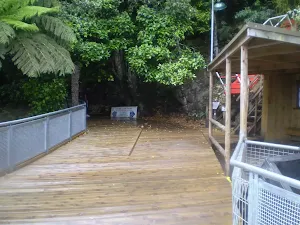
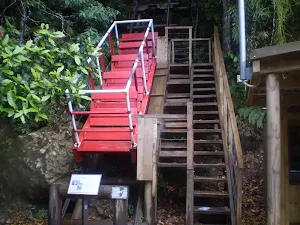
Scenic World
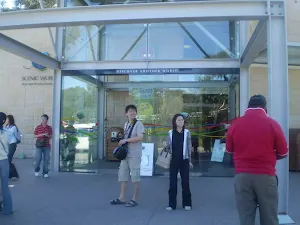
(0km) Scenic World → Landslide
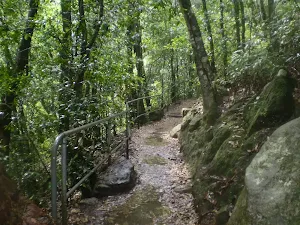
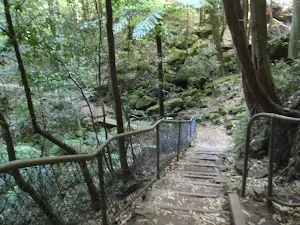
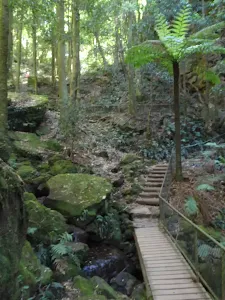
Turn left : From the bridge over the bottom of the Scenic Railway, this walk follows the signs to 'scenic walkway', passing a replica of a mining cart, as well as an old mine. Just past this, the walk comes to a pipeline that runs down the hill collecting fresh water, signposted as drinkable. Continuing past the old mine shafts along the boardwalk, this walk comes to an intersection with a bush track going slightly off to the right. This is signposted as the way to the Landslide.
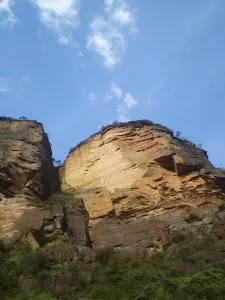
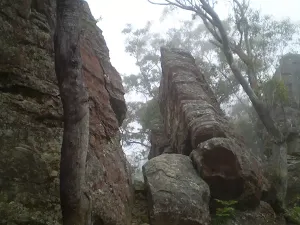
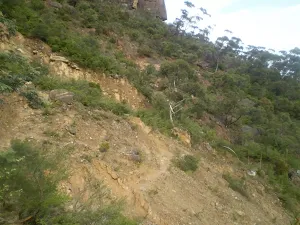
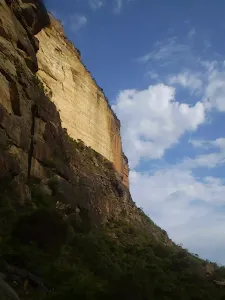
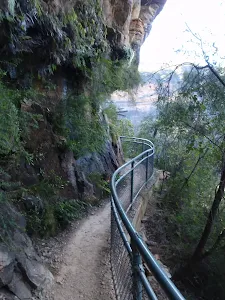
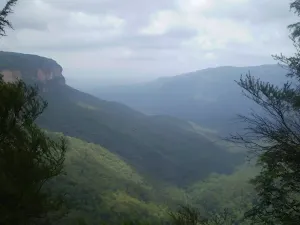
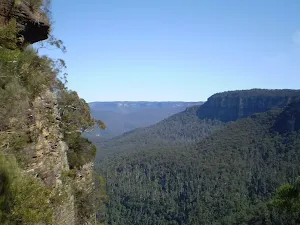
Continue straight: From the intersection, the walk follows the wide track and signposts towards the 'landslide'[2] (keeping the cliffs on the right). The walk winds along a bush track with small boulders strewn along it. There are a number of old mine shafts just off the track and some interesting historical items. The track continues under Malaita Point before breaking out of the vegetation to a worthy view of the valley, just before the landslide. As the track comes to the old landslide site, it become rougher with plenty of boulders over the track. There are also excellent views of the cliffs above and the landslide as the vegetation is quite sparse here. More info.
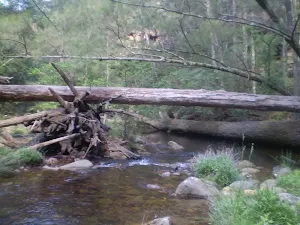
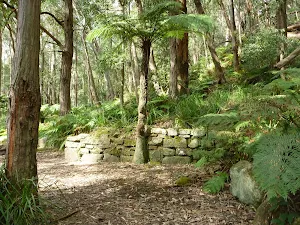
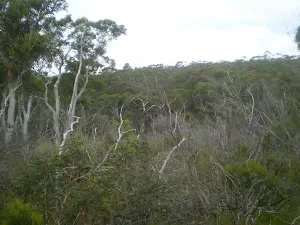
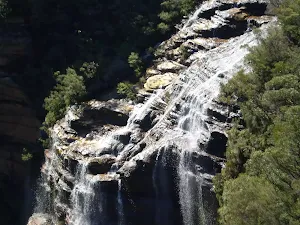
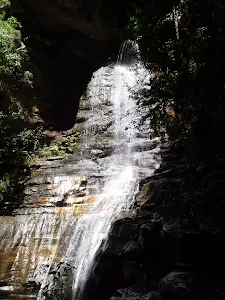
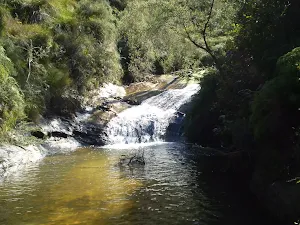
The Landslide
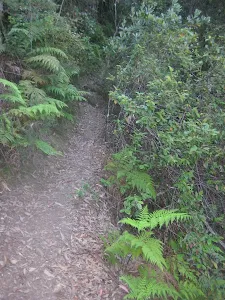
(2km) Landslide → Bottom of Golden Staircase
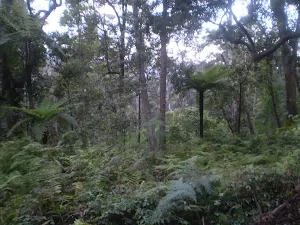
(3km) Bottom of Golden Staircase → Miners Campsite
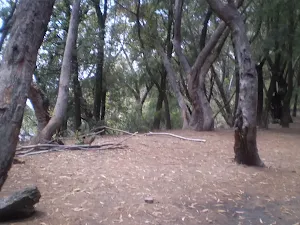
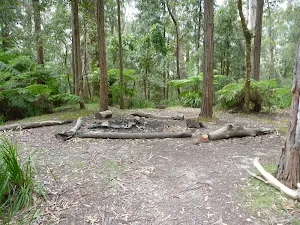
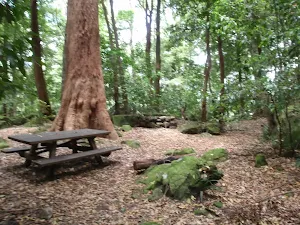
Miners Campsite
(5km) Miners Campsite → Northern Ruined Castle campsite
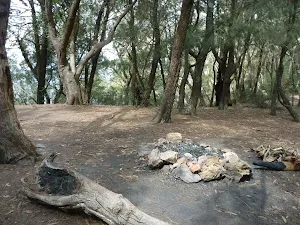
Northern Ruined Castle campsite
(6km) Northern Ruined Castle campsite → Intersection South of Ruined Castle
Continue straight: From the intersection, this walk follow the main track south-east, initially keeping the campsite and valley to your left. The track initially heads down a short rocky section[33] then flattens out to pass a large square boulder[34] after about 100m. The track continues through ferny forest for just over 200m, then passes another campsite[35] (down a steep hill to your left), and about 30m further on, comes to a signposted intersection where a 'Katoomba' arrow[36][37] points back along the track. Now Continue straight to rejoin the main walk .
(6km) Northern Ruined Castle campsite → Ruined Castle
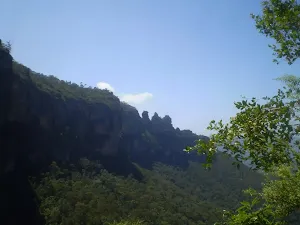
The Ruined Castle

(6km) Ruined Castle → Intersection South of Ruined Castle
(7km) Intersection South of Ruined Castle → Bottom of Korrowall Knife-edge
(8km) Bottom of Korrowall Knife-edge → Top of Korrowall Knife-edge
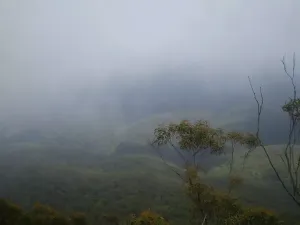
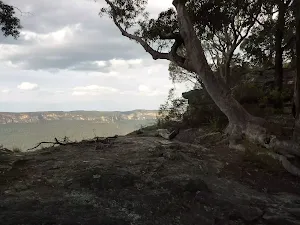
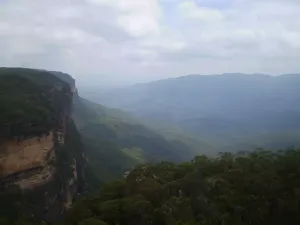
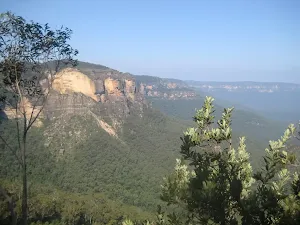
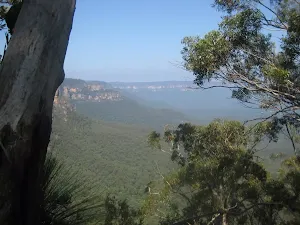
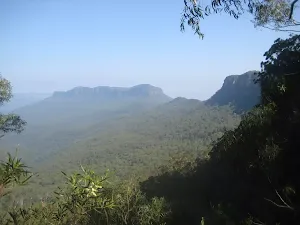
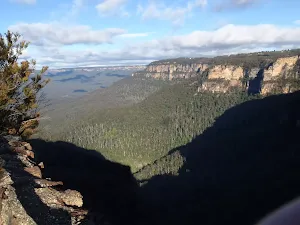
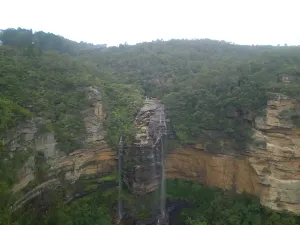
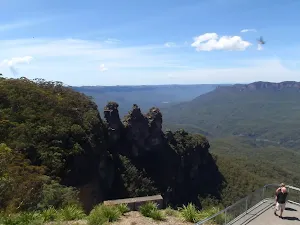
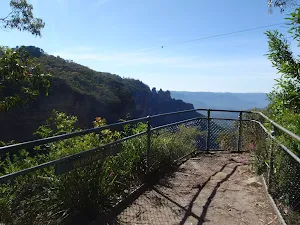
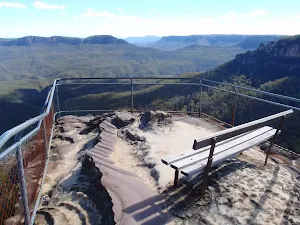
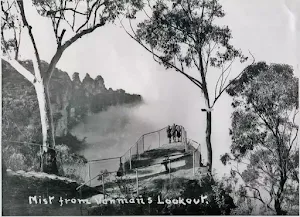
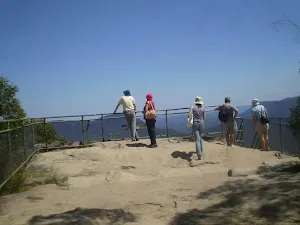
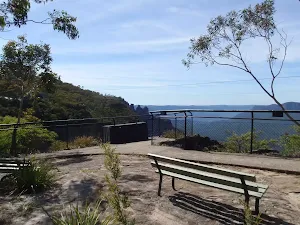
Mt Solitary Lookout

(8km) Top of Korrowall Knife-edge → Corowal Plateau campsite
Corowal Plateau campsite
(9km) Corowal Plateau campsite → Chinamans Gully Campsite
Chinamans Gully Campsite

(10km) Chinamans Gully campsite → Chinamans Gully view
End of day 1
(10km) Chinamans Gully campsite → Singa-Jingawell Creek Campsite
Singa-Jingawell Creek Campsite
(11km) Singa-Jingawell Creek Campsite → Solitary Pass
(13km) Solitary Pass → Int of Kedumba Camping and Solitary Tracks
(14km) Int of Kedumba Camping and Solitary Tracks → Kedumba River
(15km) Kedumba River → Int of Kedumba River track and Sublime Point trail
(17km) Int of Kedumba River track and Sublime Point trail → End of Kedumba River Rd
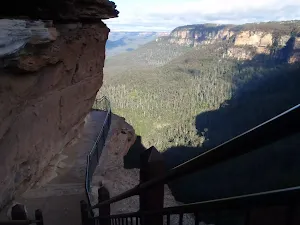
Turn left : From the intersection, this walk heads north, uphill along the management trail, following the sign to 'Wentworth Falls'. After the uphill section, the trail turns to the right and starts heading steeply up between the gap in the cliffs. The walk passes a locked gate and continues steeply up the hill until reaching the top, where the track curves around to the bends again sharply to the left - there are some great views from here. From the top of the cliffs, the track zigzags north along a relatively flat management trail until coming to the end of Kedumba Valley Rd, marked by a large towering gateway with small track around it.
(21km) End of Kedumba River Rd → King's Tableland Intersection
Turn right: From the end of Hordern Rd, this walk heads north along the management trail, away from the power lines, and after approximately 100m passes a large wire gate. Another 100m on from here, the trail passes a large green gate and sign saying 'Kings Tableland Track'. After this, the flat management trail continues until coming to an intersection with another management trail, signposted as the 'Rocket Point Track.
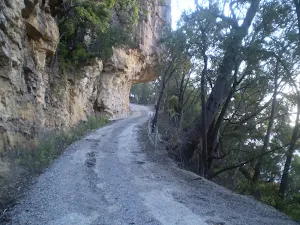
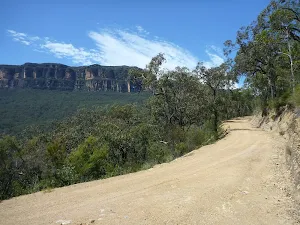
King's Tableland
(26km) King's Tableland Intersection → Top of Wentworth Falls
Turn right: From the intersection, this walk heads east following the 'Wentworth Falls' sign down the narrow track towards the creek. The track turns left when it comes to a point above the creek and then follows this creek downstream to come to an intersection marked with a 'Round Walk' signpost.
Turn right: From the intersection, this walk follows the track away from the 'Round Walk' sign to zigzag down the hill a short distance to the well-managed and fenced track below (marked with a 'Rocket Point Circuit' pointing back up).
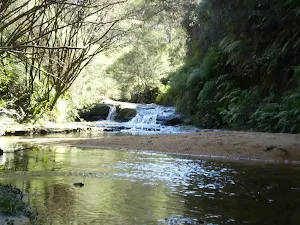
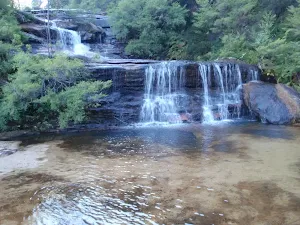
Turn right: From the intersection, this walk keeps the handrail on the left and cross a small creek using the stepping stones. The track soon leads to a large pool, Queen's Cascades and a fenced creek crossing, the top of Wentworth Falls.
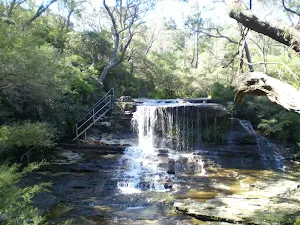
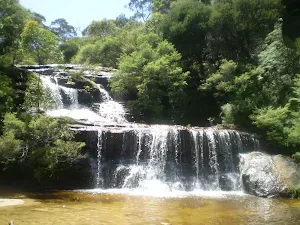
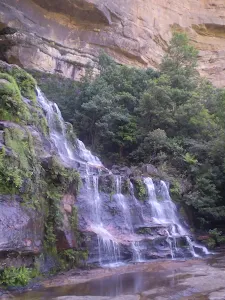
Queen's Cascades
(27km) Top of Wentworth Falls → Weeping Rock waterfall
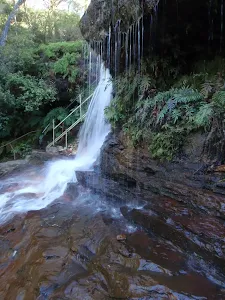
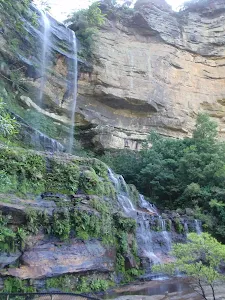
Turn right: From the intersection, this walk follows the 'Weeping Rock Circuit' and 'Darwins walk' signs up a few steps and between the rocks. The track soon leads to a great view of Weeping Rock, then heads down some steps onto a slippery rock platform, beside a pool at the base of Weeping Rock waterfall.
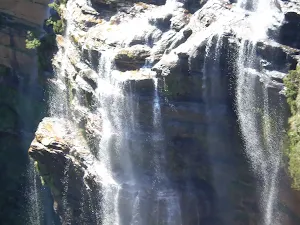
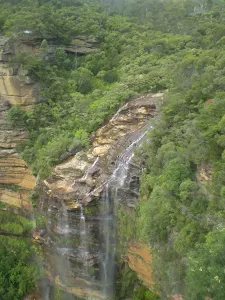
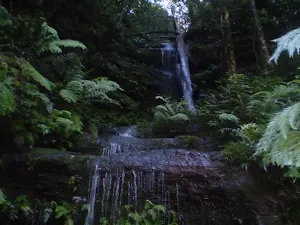
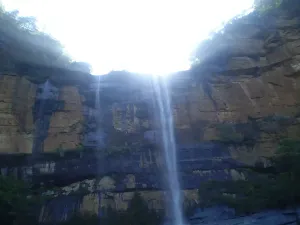
Weeping Rock
(27km) Weeping Rock waterfall → Int of Charles Darwin and Weeping Rock Tracks
(27km) Int of Charles Darwin and Weeping Rock Tracks → Wentworth Falls Railway Station
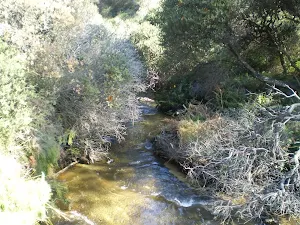
Continue straight: From the intersection, this walk heads upstream beside the creek. This track goes along a mixture of boardwalk and bush track until continuing on a long section of boardwalk. The walk crosses the creek and goes up a steep set of stairs, then past a beautiful section of creek where the water cascades down the rocks. Shortly the cascades, the track crosses the creek using a foot bridge and comes to a signposted intersection with 'Parkes Street' track (on the left). From the intersection, this walk follows the clear track upstream (keeping the creek through the bush, on the right). The track bends right passing a bench seat and crossing the creek on a footbridge. On the other side of the bridge the walk climbs the stairs then gently meanders along the side of the creek till coming to a clearing. On the other side of the clearing the walk comes to an intersection just before the pipe bridge.
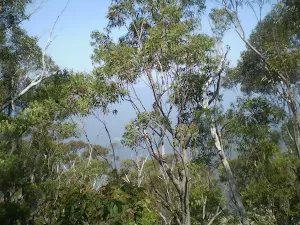
Continue straight: From the intersection, this walk follows 'Village' sign along the track and under the large pipeline (keeping Jamison Creek on the left). The track meanders alongside the creek over some timber platforms and through a lovely Banksia grove. After a short time the walk passes a 'Charles Darwin walk' sign and comes to an intersection with a timber bridge on the left of the track.
Turn right: From the intersection, this walk heads up the stairs (away from the bridge and creek) and turns left. The walk almost immediately comes to an intersection with a set of stairs (heading up to Page Ave on the right) and a sign pointing to 'Wilson Park'.
Continue straight: From the intersection, this walk follows 'Wilson Park' and 'Village' signs down some steps and along the track (keeping the creek to the left). The track soon passes a bush regeneration information sign and heads into an open pine forest. The walk then crosses the creek on a small timber bridge and heads up the hill. Soon the track passes under the 'Charles Darwin Walk' arch and enters Wilson Park (just next to the tennis courts).
Continue straight: From the the archway in Wilson Park, this walk heads away from the tennis courts, keeping the creek on the right. At the far end of the park, the walk comes to the Great Western Highway and turns right. After about 150m, this walk crosses the highway at the traffic lights and heads up Station St, past the shops and up to Wentworth Falls Railway Station on the right.
Maps for the Katoomba to Wentworth Falls via the Jamison Valley walk
You can download the PDF for this walk to print a map.
These maps below cover the walk and the wider area around the walk, they are worth carrying for safety reasons.
| Six Foot Track | 1:50 000 Map Series | Six Foot Track | NSW-six-foot-track |
| Jamison | 1:25 000 Map Series | 89302N JAMISON | NSW-89302N |
| Katoomba | 1:25 000 Map Series | 89301S KATOOMBA | NSW-89301S |
| Katoomba | 1:100 000 Map Series | 8930 KATOOMBA | 8930 |
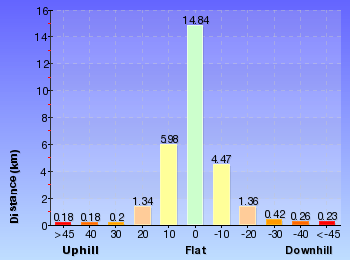
Cross sectional view of the Katoomba to Wentworth Falls via the Jamison Valley bushwalking track

Analysis and summary of the altitude variation on the Katoomba to Wentworth Falls via the Jamison Valley
Overview of this walks grade – based on the AS 2156.1 – 2001
Under this standard, a walk is graded based on the most difficult section of the walk.
| Length | 29.2 km | ||
| Time | 2 Days | ||
| . | |||
Grade 5/6 Experienced only | AS 2156.1 | Gradient | Very steep and difficult scrambles (5/6) |
| Quality of track | Rough unclear track (5/6) | ||
| Signs | No directional signs (5/6) | ||
| Experience Required | High level of bushwalking experience recommended (5/6) | ||
| Weather | Forecast, unforecast storms and severe weather likely to have an impact on your navigation and safety (5/6) | ||
| Infrastructure | No facilities provided (5/6) |
Some more details of this walks Grading
Here is a bit more details explaining grading looking at sections of the walk
Gradient
8km of this walk is very steep and another 7km has short steep hills. Whilst another 6km has gentle hills with occasional steps and a 5km section is flat with no steps. The remaining 3km is very steep with difficult rock scrambles.
Quality of track
7km of this walk follows a rough track, where fallen trees and other obstacles are likely and another 7km follows a smooth and hardened path. Whilst another 6km follows a formed track, with some branches and other obstacles and a 6km section follows a clear and well formed track or trail. The remaining 3.4km follows a rough unclear track.
Signs
12km of this walk is clearly signposted and another 7km has directional signs at most intersection. Whilst another 7km has minimal directional signs and the remaining 3.6km Has no directional signs.
Experience Required
11km of this walk requires no previous bushwalking experience and another 7km requires some bushwalking experience. Whilst another 7km requires a leader a with moderate level of bushwalking experience and the remaining 4.8km requires a leader with a high level of bushwalking experience.
weather
18km of this walk is not usually affected by severe weather events (that would unexpectedly impact safety and navigation) and another 7km is affected by forecast, unforecast storms and severe weather events that may impact on navigation and safety. Whilst another 4.9km is affected by storms that may impact your navigation and safety and the remaining 450m forecast, unforecast storms and severe weather likely to have an impact on your navigation and safety.
Infrastructure
12km of this walk is close to useful facilities (such as fenced cliffs and seats) and another 6km has limited facilities (such as not all cliffs fenced). Whilst another 6km has limited facilities (such as cliffs not fenced, significant creeks not bridged) and the remaining 4.8km has no facilities provided.
Similar walks
A list of walks that share part of the track with the Katoomba to Wentworth Falls via the Jamison Valley walk.
Furber Steps-Scenic Railway
869 m Circuit, 1 hr 15 mins

Hard track
Rocket Point Lookout Track
1.3 km Return, 1 Hr
Moderate track
The Weeping Rock and Fletchers Lookout Tracks
1.4 km Circuit, 45 mins
Moderate track
The Falls Picnic Area to Upper Wentworth Falls
1.5 km Return, 45 mins
Moderate track
Kings Tableland Walk
1.6 km One way, 45 mins
Easy track
Scenic Railway to the Landslide
2.7 km Return, 2 hrs 30 mins
Moderate track
Scenic Railway - Federal Pass Track
3.1 km One way, 3 hrs
Hard track
Echo Point to Scenic World via Giant Stairway
3.1 km One way, 3 hrs
Hard track
National Pass from Wentworth Falls to Conservation Hut
3.6 km One way, 3 hrs
Hard track
Overcliff-Undercliff Track
4 km Circuit, 2 hrs
Moderate track
Federal Pass
4.4 km One way, 3 hrs 45 mins
Hard track
National Pass
4.6 km Circuit, 3 hrs 30 mins
Hard track
National Pass, Overcliff and Den Fenella Circuit
5 km Circuit, 4 hrs
Hard track
Wentworth Pass
5.1 km Circuit, 4 hrs
Hard track
The Charles Darwin Walk
5.6 km Return, 2 hrs
Moderate track
Scenic Railway to Golden Staircase Circuit
5.9 km Circuit, 3 hrs 30 mins
Hard track
Leura to Katoomba via Dardanelles Pass
6.6 km One way, 4 hrs

Hard track
Wentworth Falls Conservation Hut Loop
6.7 km Circuit, 3 hrs
Hard track
Scenic Railway to Leura Forest
6.7 km Return, 4 hrs 30 mins
Moderate track
Scenic World down Furber Steps to Narrow Neck loop
6.8 km Circuit, 5 hrs
Hard track
Ruined Castle Walk
7.9 km Return, 5 hrs
Hard track
Federal Pass Walking Track
8 km One way, 5 hrs
Hard track
Charles Darwin, National Pass and Nature Track walk
8.6 km Circuit, 5 hrs
Hard track
Wentworth Falls Station Loop (Undercliff Walk)
8.9 km Circuit, 4 hrs 30 mins
Hard track
Under and Over Cliff Walk
9.4 km Circuit, 4 hrs
Moderate track
Wentworth Falls Station Loop
9.5 km Circuit, 5 hrs 30 mins

Hard track
Wentworth Falls Loop
10.2 km Circuit, 6 hrs
Hard track
Golden Staircase to Mt Solitary via Ruined Castle
11.7 km Return, 8 hrs 45 mins
Experienced only
Scenic Railway to Ruined Castle
12.4 km Return, 7 hrs 30 mins
Hard track
Scenic Railway to Mt Solitary via the Ruined Castle
16.2 km Return, 11 hrs
Experienced only
Scenic Railway - Ruined Castle - Mt Solitary - Kedumba River - Wentworth Falls
29.3 km One way, 3 Days
Experienced only
Mt Solitary and Kedumba Valley Circuit
33.8 km Circuit, 3 Days
Experienced only
Other Nearby walks
A list of walks that start near the Katoomba to Wentworth Falls via the Jamison Valley walk.
Katoomba Falls Circuit
1.5 km Circuit, 1 hr 45 mins
Hard track
Scenic World to base of Katoomba Falls (Via Furber Steps)
1.7 km Return, 3 hrs 45 mins

Hard track
Scenic World to Echo Point
2.1 km One way, 1 hr 15 mins
Moderate track
Scenic World to Katoomba Falls Lookout
1.2 km Return, 2 hrs
Hard track
Scenic world to Three Sisters Loop via Furber Steps
5.8 km Circuit, 5 hrs 30 mins
Hard track
The Prince Henry Cliff Walk
6.8 km One way, 3 hrs 30 mins
Moderate track
Witches Leap Circuit
1.1 km Circuit, 2 hrs
Hard track
Katoomba Falls to Echo Point via Prince Henry Cliff Walk
1.8 km One way, 1 Hr
Moderate track
Katoomba Kiosk to base of Katoomba Falls
1.7 km Return, 2 hrs
Hard track
Katoomba Kiosk to Katoomba Falls
1.1 km Return, 45 mins
Moderate track
Reids Plateau Loop
352 m Circuit, 20 mins
Moderate track
Round Walk
854 m Circuit, 45 mins
Hard track
Plan your trip to and from the walk here
The Katoomba to Wentworth Falls via the Jamison Valley walk starts at the Scenic World (gps: -33.728585, 150.30095)
The Katoomba to Wentworth Falls via the Jamison Valley ends at the Wentworth Falls Railway Station (gps: -33.709737, 150.37644)
Weather Forecast
This walk starts in the Central Tablelands weather district.
Current Alerts
Park Information
Blue Mountains National Park
Attracting over 3 million visitors annually, Blue Mountains National Park holds some of Australia's most spectacular and diverse wilderness areas. Explore the Grose Valley, with its sheer sandstone cliffs, waterfalls and scenic walking, or enjoy the famous views of the Three Sisters. Easy access makes a day trips very worthwhile, but with such diversity it would be great to stay in one of the many B&B's and spend a few days soaking up the region.
Comments
Short URL: http://wild.tl/ktwfvtjv