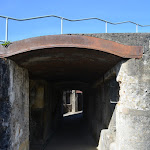
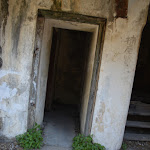
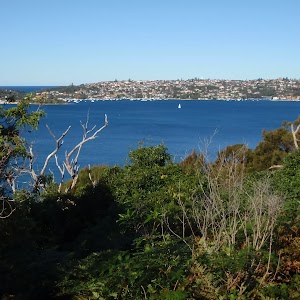
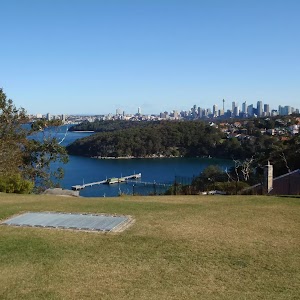
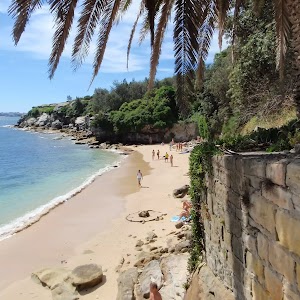
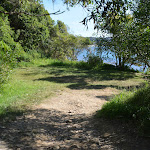
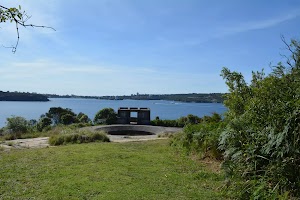
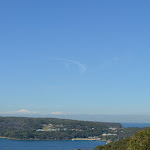
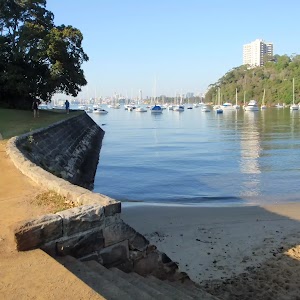
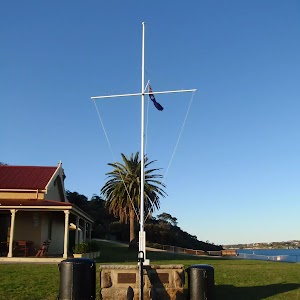
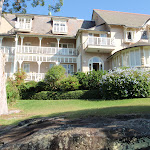
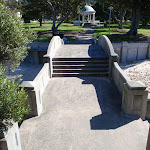
This walk guides you through the historic and well maintained outer Middle Head fortification battery. Take a step back in time, by walking along Old Fort Road past the old barracks and through the banksia forest to the open clearing and array of gun emplacements. At the fortification, you can explore the tunnels, underground rooms and circular gun emplacements, enjoy the views of the sea cliffs and harbour views.
Middle Head Battery walk
And Walk
Middle Head Battery walk


30 mins
664 m Return

10 m
Easy track


(0km) Cobblers Beach Trail trackhead → Int. Old Fort and Govenors Rds

70 m
1 mins
0m
-3m
Very easy
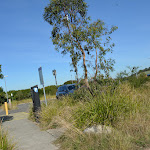
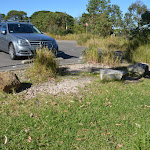
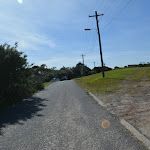
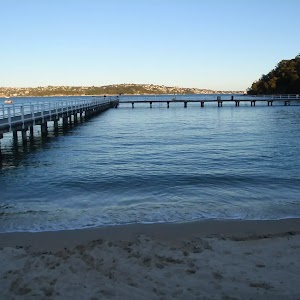
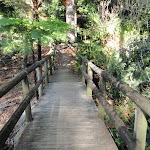
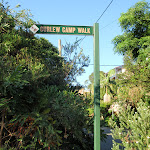
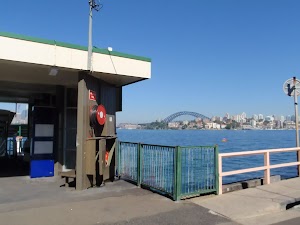
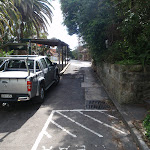
From the Cobblers Beach Trail track head (beside the car park[1] near the end of Middle Head Rd,
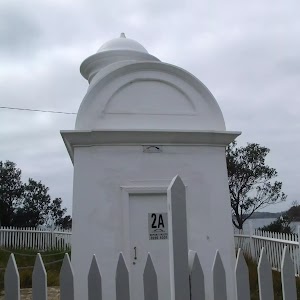
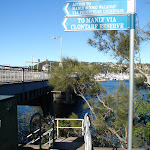
Mosman[2]), this walk heads to the very end of Middle Head Rd towards the sandstone wall[3]. After 50m the walk heads over the bridged ‘Middle Head Moat’[4][5], then around the boom gate to come to a signposted intersection with ‘Old Fort Rd’ and ‘Govenors Rd’[6]. (There is a public toilet
Mosman[2]), this walk heads to the very end of Middle Head Rd towards the sandstone wall[3]. After 50m the walk heads over the bridged ‘Middle Head Moat’[4][5], then around the boom gate to come to a signposted intersection with ‘Old Fort Rd’ and ‘Govenors Rd’[6]. (There is a public toilet

in the sandstone building the right)
(0.07km) Int. Old Fort and Govenors Rds → Old Fort Road gun brackets
220 m
4 mins
2m
-4m
Easy track
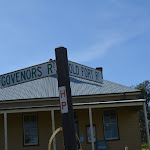
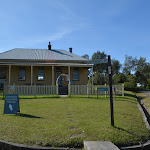
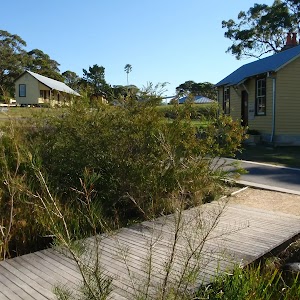
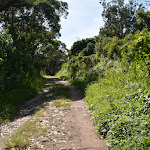
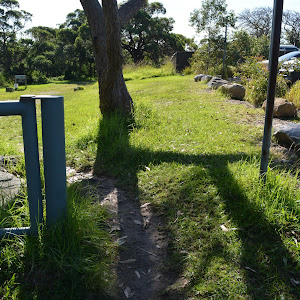
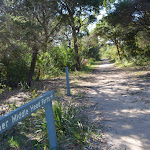
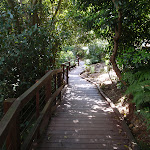
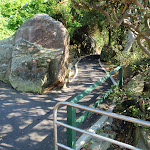
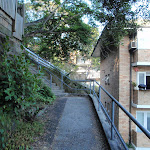
Continue straight: From the intersection, this walk heads gently uphill along the signposted and asphalt ‘Old Fort Rd’[7], initially keeping the toilet to the right
and ‘Barracks No.1’[8] to the left. After about 130m the old road heads over a rise and then leads down between the metal bollards[9] to come to an intersection in a large clearing beside a row large gun timber brackets (bases)[10], marked with a ‘Middle Head’ sign[11]
(0.29km) Old Fort Road gun brackets → Middle Head Fort
50 m
1 mins
1m
0m
Easy track
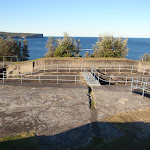
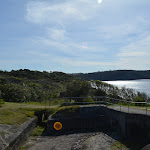
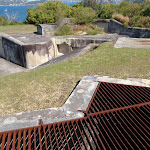
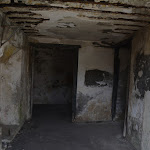
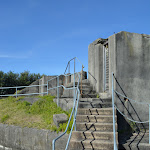
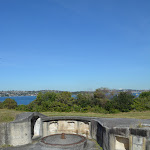
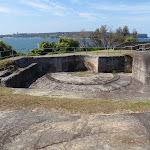
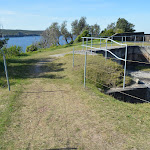
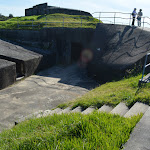
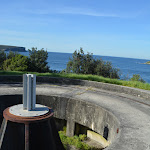
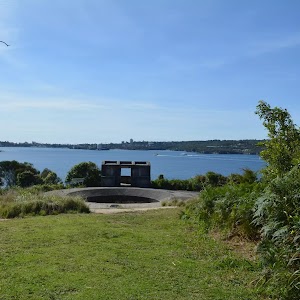
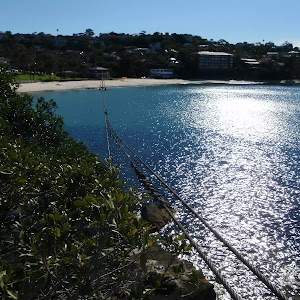
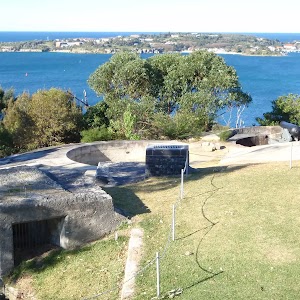
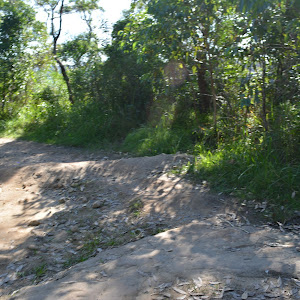
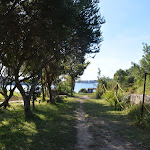
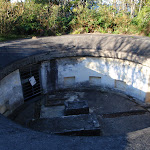
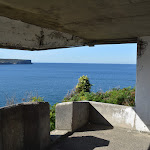
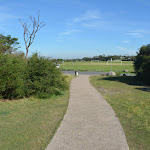
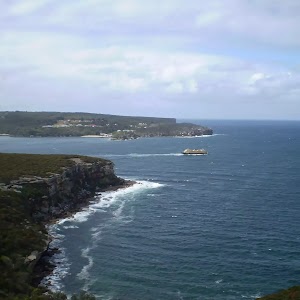
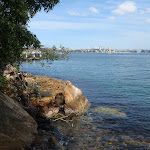
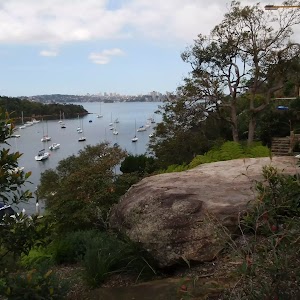
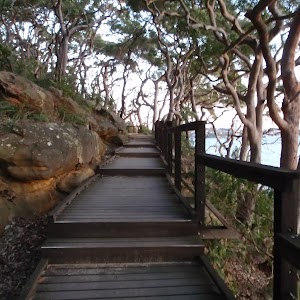
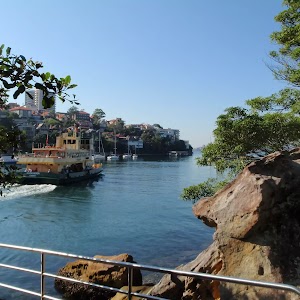
Continue straight: From beside the row of large gun timber brackets (bases)[12], this walk heads downhill for 50m along the wide gravely trail[13] towards the water to come the large network of concrete and sandstone forts and gun emplacements[14][15][16]. The area can be explored, taking care of cliff edges and large potential falls into the fortifications.
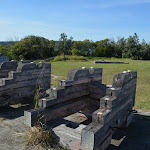
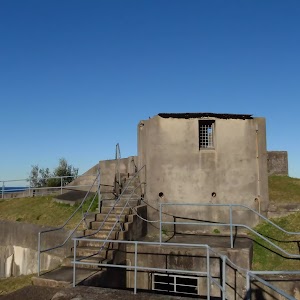
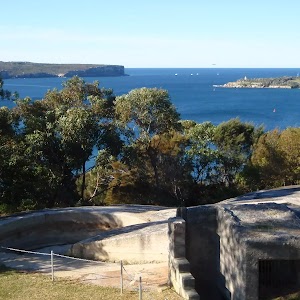
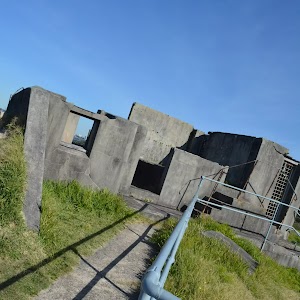
Outer Middle Head Battery
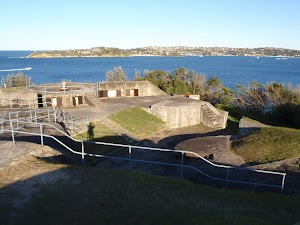
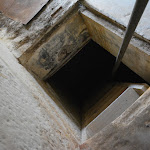
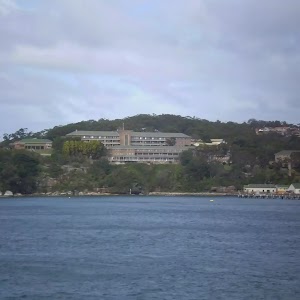
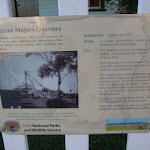
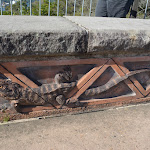
The Outer Middle Head Battery is the main complex in the Middle Head Fortifications. Work for building the fortifications started in 1801 and the last batteries were constructed in 1942, with the majority of the work being done 1870 and 1911 . There is a network of tunnels and rooms underground that was build to support the gunning placements to protect Sydney Harbour from enemy invasion. There are formal tours available or you can take care and explore the area yourself.
(0.33km) Outer Forts → Western Fort
110 m
4 mins
5m
-31m
Hard track
Turn left: From the open area beside the outer forts, this walk heads north[18] keeping the tallest fort[19] to the right. After about 10m the walk turns right to follow a wide grassy track behind a tree and across a bridge[20] giving more views of the concrete forts[21] (on the right). The walk continues around the back of the forts for about 50m, then veers left to head more steeply down

[22] for another 15m to come beside the unfenced western forts[23] and tall cliff[24]. Keep two full body lengths back from cliffs and significant drops to reduce the risk of falling. At the end of this side trip, retrace your steps back to the main walk then Turn sharp right.
Maps for the Middle Head Battery walk walk
You can download the PDF for this walk to print a map.
These maps below cover the walk and the wider area around the walk, they are worth carrying for safety reasons.
| Sydney Heads | 1:25 000 Map Series | 91302N SYDNEY HEADS | NSW-91302N |
| Sydney | 1:100 000 Map Series | 9130 SYDNEY | 9130 |
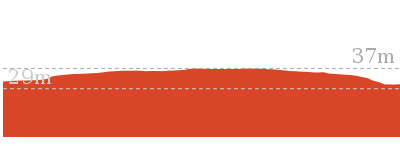
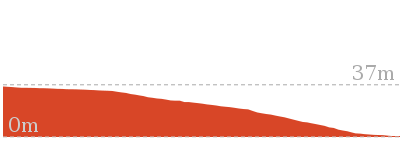
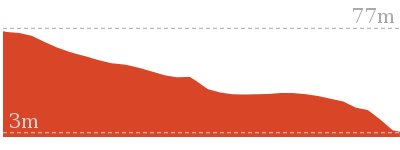
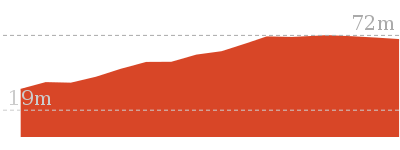
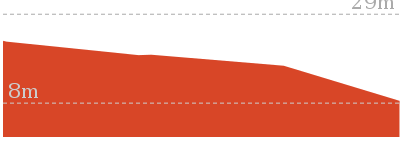
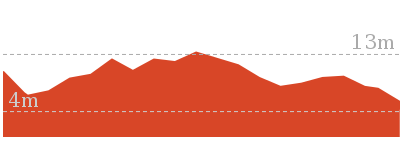
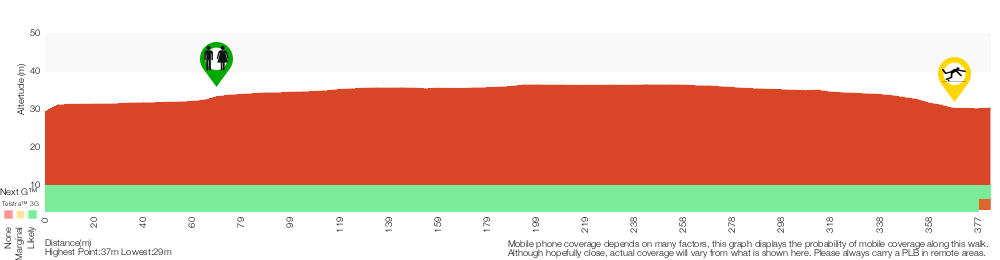
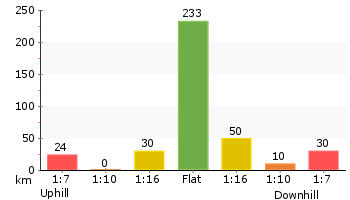
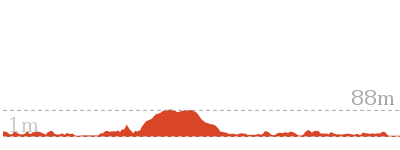
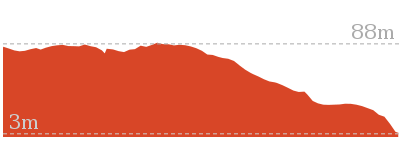
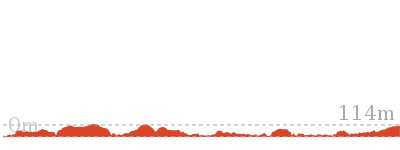
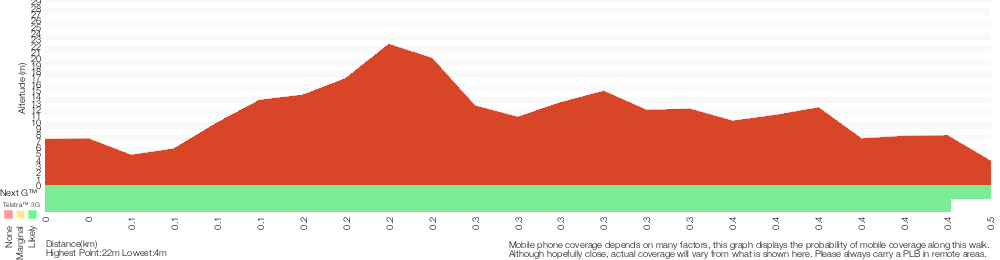
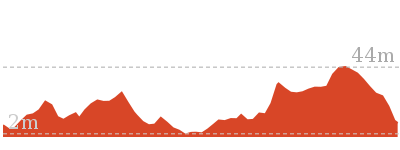
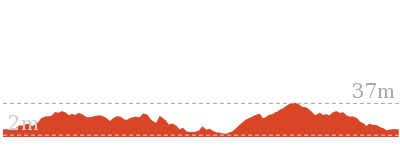
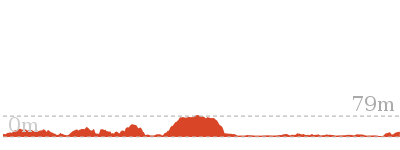
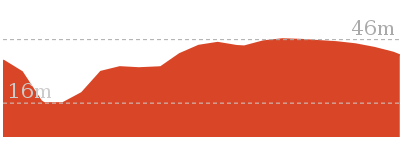
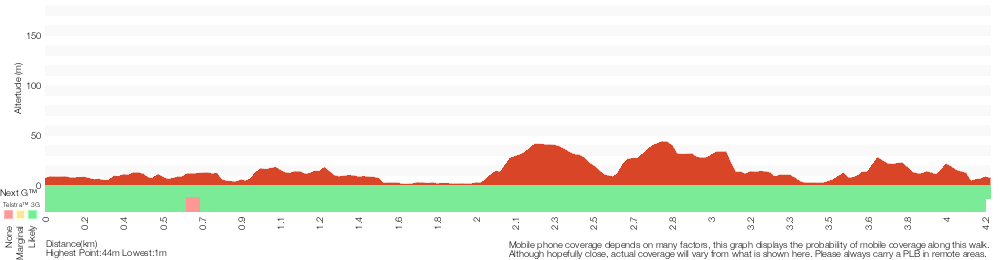
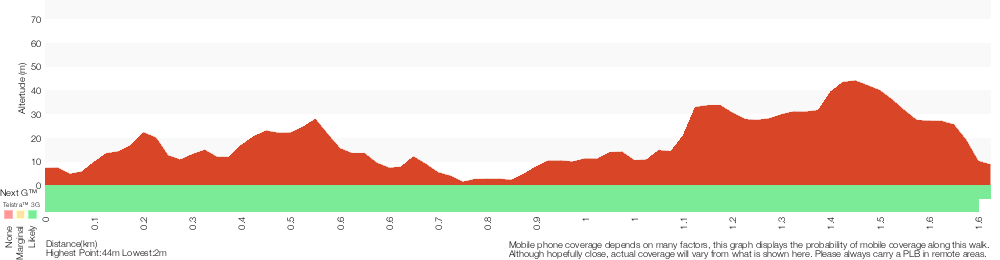
Cross sectional view of the Middle Head Battery walk bushwalking track
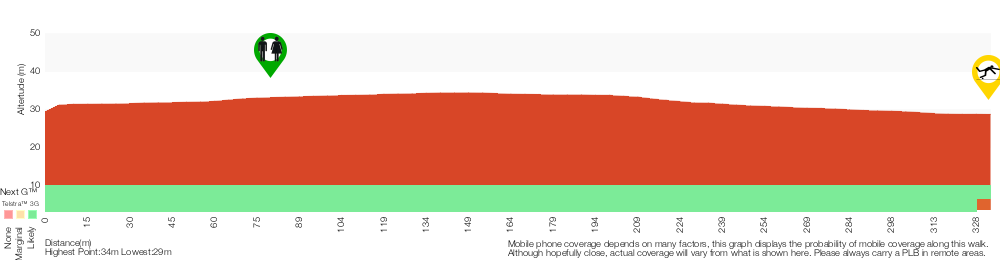
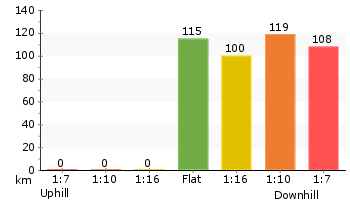
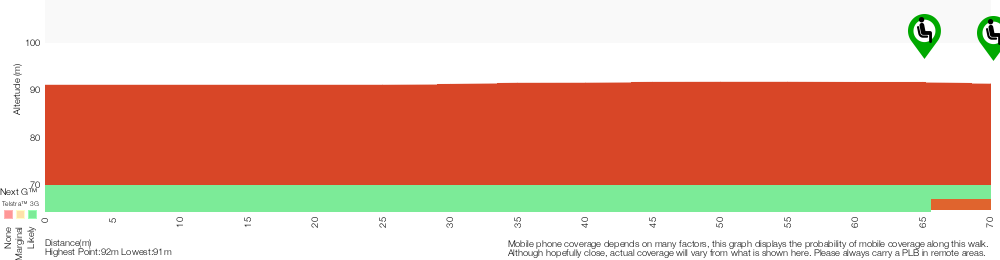
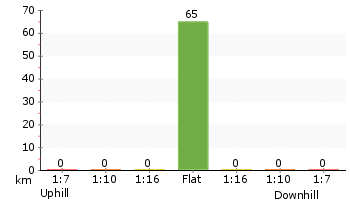
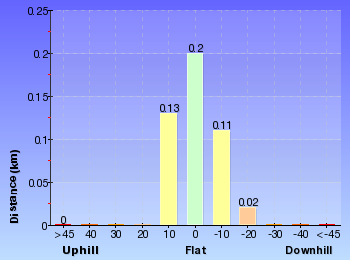
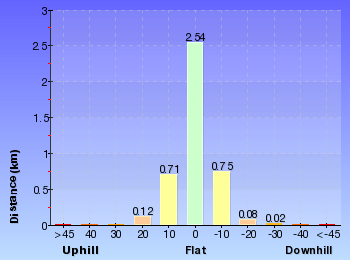
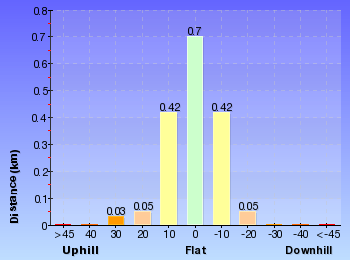
Analysis and summary of the altitude variation on the Middle Head Battery walk

Accessibility summary information for the Middle Head Battery walk
Parking: There are 0 designated accessible parking areas on this walk.
Toilets: There are 0 designated accessible toilets on this walk.
Seats: There are 0 places to sit on this walk.
Hazards: There are 1 specific noteable accessability related hazards on this walk.
Trip Hazard Ground is rough and slopes moderately steeply down to unfenced drop into gun emplcement and cliff edge. Significant unfenced fall risk. Found about 330m into the walk.
Accessibility Details

Found 80m into this walk

Overview of this walks grade – based on the AS 2156.1 – 2001
Under this standard, a walk is graded based on the most difficult section of the walk.
| Length | 664 m | ||
| Time | 30 mins | ||
| . | |||
| Grade 2/6 Easy track |
AS 2156.1 | Gradient | Gentle hills with occasional steps (2/6) |
| Quality of track | Clear and well formed track or trail (2/6) | ||
| Signs | Clearly signposted (1/6) | ||
| Experience Required | No experience required (1/6) | ||
| Weather | Weather generally has little impact on safety (1/6) | ||
| Infrastructure | Generally useful facilities (such as fenced cliffs and seats) (1/6) |
Some more details of this walks Grading
Here is a bit more details explaining grading looking at sections of the walk
Gradient
Around 270m of this walk has gentle hills with occasional steps, whilst the remaining 65m is flat with no steps.
Quality of track
Around 270m of this walk follows a clear and well formed track or trail, whilst the remaining 65m follows a smooth and hardened path.
Signs
This whole walk, 330m is clearly signposted.
Experience Required
This whole walk, 330m requires no previous bushwalking experience.
weather
This whole walk, 330m is not usually affected by severe weather events (that would unexpectedly impact safety and navigation).
Infrastructure
This whole walk, 330m is close to useful facilities (such as fenced cliffs and seats).
Similar walks
A list of walks that share part of the track with the Middle Head Battery walk walk.
762 m Return
30 mins
Moderate track
1.9 km Circuit
1 Hr
Moderate track

3.9 km Circuit
2 hrs
Hard track
4.9 km Circuit
2 hrs 30 mins
Moderate track

6.1 km One way
2 hrs 30 mins
Hard track

Other Nearby walks
A list of walks that start near the Middle Head Battery walk walk.
930 m Return
30 mins
Hard track
4.3 km One way
2 hrs 30 mins
Hard track
904 m Return
30 mins
Easy track
144 m Return
7 mins
Very easy

1.7 km Return
1 Hr
Moderate track
842 m Return
30 mins
Moderate track
1.7 km Return
1 Hr
Moderate track
200 m Return
30 mins
Moderate track
2 km Return
1 Hr
Moderate track


60 m Return
3 mins
Moderate track

358 m Return
15 mins
Easy track
992 m Return
30 mins
Moderate track
Plan your trip to and from the walk here
The Middle Head Battery walk walk starts and ends at the Cobblers Beach Trail trackhead (gps: -33.826961, 151.2643)
Your transport options to Cobblers Beach Trail trackhead are by;
![]() Bus. (get details)
Bus. (get details)
![]() Car. Parking fees apply in the area.
Car. Parking fees apply in the area.
(get details)


Short URL = http://wild.tl/mhbw
Gallery images
There are other downloads I am still working on.
You will probably need to login to access these — still all free.
* KML (google earth file)
* GPX (GPS file)
Special Maps/ brochures
* A3 topo maps
* PDF with Lands Topo map base
* PDF with arial image (and map overlay)
I wanted to get the main site live first, this extra stuff will come in time.
Happy walking
Matt 🙂
Cobblers Beach
And Walk
Cobblers Beach

30 mins
930 m Return
58 m
Hard track
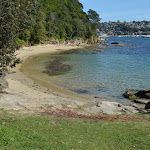
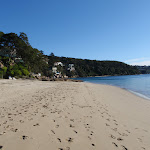
This walk guides you down a short but fairly steep trail to the beautiful Cobblers Beach. The beach is a small pretty and clothing optional beach on the northern edge of Middle Head in Sydney Harbour NP. There is a grassy area above the beach if you want to picnic and the water is generally protected from the swell and the rocks on the shoreline are interesting to explore.


(0km) Cobblers Beach Trail trackhead → Cobblers Beach Trail sign
50 m
1 mins
0m
-2m
Easy track

(0.05km) Cobblers Beach Trail sign → Cobblers Beach
420 m
10 mins
8m
-48m
Hard track
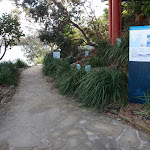
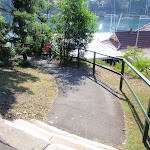
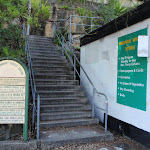
Continue straight: From the intersection, this walk follows the ‘Cobblers Beach Road’ arrow on the ‘Sydney Harbour National Park’ sign[5] downhill along the gravely management trail. After 110m the trail narrows for about 5m (to 90cm) to pass a pile of spoil[6] then about 20m later comes in an unmarked intersection (with a faint track on the right)[7].
Continue straight: From the intersection, the walk follows the wide management trail downhill. The trail starts to bend left and heads noteably more steeply downhill
Continue straight: From the intersection, the walk follows the wide management trail downhill. The trail starts to bend left and heads noteably more steeply downhill

[8] in places over the next 220m where the trail mostly flattens out[9] and bends sharply right. After this bend, the trail continues to lead more gently downhill for another 50m to come to an open grassy area signposted as ‘Cobblers Beach’[10]. Access to the sand is down a few uneven stone steps

.
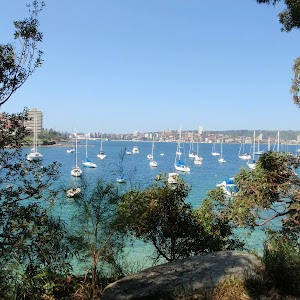
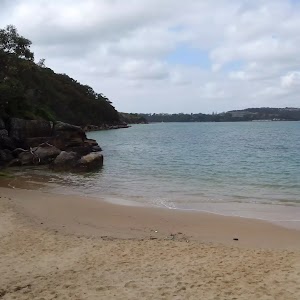
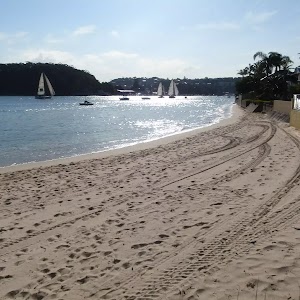
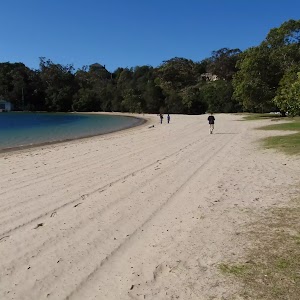
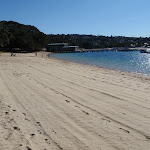
Cobblers Beach

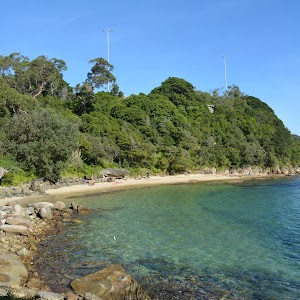
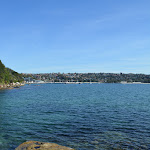
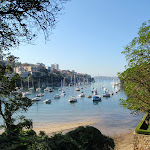
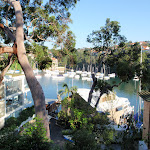
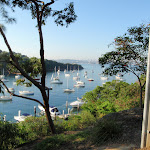
Cobblers Beach[11] is a small pretty and clothing optional beach on the northern edge of Middle Head in Sdynday Harbour NP. From the beach, you can see across the water to Grotto Point and Balmoral Beach in the distance. The small sandy beach is about 80m long and about 10m wide depending on the tide. There are rocks along the shorline[13]. Wearing clothing is optional on the sandy beach area however clothing is required to be worn in the surrounding bushland and on the grassed area directly behind the beach.
Maps for the Cobblers Beach walk
You can download the PDF for this walk to print a map.
These maps below cover the walk and the wider area around the walk, they are worth carrying for safety reasons.
| Sydney Heads | 1:25 000 Map Series | 91302N SYDNEY HEADS | NSW-91302N |
| Sydney | 1:100 000 Map Series | 9130 SYDNEY | 9130 |
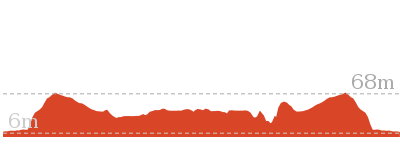
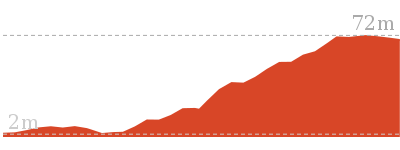
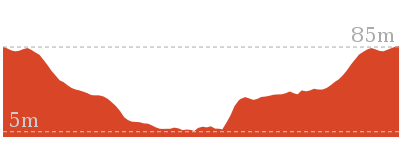
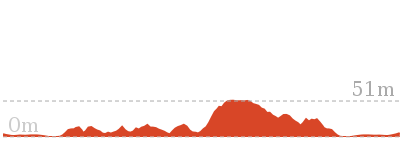
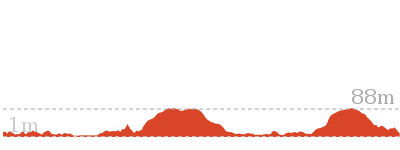
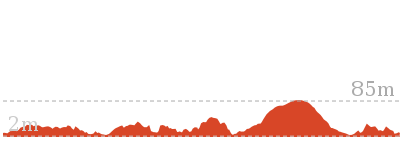
Cross sectional view of the Cobblers Beach bushwalking track

Analysis and summary of the altitude variation on the Cobblers Beach
Accessibility summary information for the Cobblers Beach
Parking: There are 0 designated accessible parking areas on this walk.
Toilets: There are 0 designated accessible toilets on this walk.
Seats: There are 0 places to sit on this walk.
Hazards: There are 1 specific noteable accessability related hazards on this walk.
Trip Hazard A series of 4 cut sandstone steps (ranging up to 34cm high) and debris to access sandy beach area. Found about 440m into the walk.
Accessibility Details
Found 20m into this walk

Overview of this walks grade – based on the AS 2156.1 – 2001
Under this standard, a walk is graded based on the most difficult section of the walk.
| Length | 930 m | ||
| Time | 30 mins | ||
| . | |||
| Grade 4/6 Hard track |
AS 2156.1 | Gradient | Very steep (4/6) |
| Quality of track | Formed track, with some branches and other obstacles (3/6) | ||
| Signs | Directional signs along the way (3/6) | ||
| Experience Required | No experience required (1/6) | ||
| Weather | Weather generally has little impact on safety (1/6) | ||
| Infrastructure | Limited facilities, not all cliffs are fenced (3/6) |
Some more details of this walks Grading
Here is a bit more details explaining grading looking at sections of the walk
Gradient
Around 290m of this walk is very steep, whilst the remaining 180m has gentle hills with occasional steps.
Quality of track
Around 420m of this walk follows a formed track, with some branches and other obstacles, whilst the remaining 50m follows a clear and well formed track or trail.
Signs
Around 420m of this walk has directional signs at most intersection, whilst the remaining 50m is clearly signposted.
Experience Required
This whole walk, 470m requires no previous bushwalking experience.
weather
This whole walk, 470m is not usually affected by severe weather events (that would unexpectedly impact safety and navigation).
Infrastructure
Around 290m of this walk has limited facilities (such as not all cliffs fenced), whilst the remaining 180m is close to useful facilities (such as fenced cliffs and seats).
Similar walks
A list of walks that share part of the track with the Cobblers Beach walk.
1.9 km Circuit
1 Hr
Moderate track
3.9 km Circuit
2 hrs
Hard track
4.9 km Circuit
2 hrs 30 mins
Moderate track
Other Nearby walks
A list of walks that start near the Cobblers Beach walk.
762 m Return
30 mins
Moderate track
664 m Return
30 mins
Easy track
4.3 km One way
2 hrs 30 mins
Hard track
904 m Return
30 mins
Easy track
144 m Return
7 mins
Very easy
1.7 km Return
1 Hr
Moderate track
842 m Return
30 mins
Moderate track
1.7 km Return
1 Hr
Moderate track
200 m Return
30 mins
Moderate track
2 km Return
1 Hr
Moderate track
60 m Return
3 mins
Moderate track
358 m Return
15 mins
Easy track
Plan your trip to and from the walk here
The Cobblers Beach walk starts and ends at the Cobblers Beach Trail trackhead (gps: -33.826982, 151.26425)
Your transport options to Cobblers Beach Trail trackhead are by;
![]() Bus. (get details)
Bus. (get details)
![]() Car. Parking fees apply in the area.
Car. Parking fees apply in the area.
(get details)
Short URL = http://wild.tl/cb
Gallery images
There are other downloads I am still working on.
You will probably need to login to access these — still all free.
* KML (google earth file)
* GPX (GPS file)
Special Maps/ brochures
* A3 topo maps
* PDF with Lands Topo map base
* PDF with arial image (and map overlay)
I wanted to get the main site live first, this extra stuff will come in time.
Happy walking
Matt 🙂
Inner Middle Head Battery walk
And Walk
Inner Middle Head Battery walk

30 mins
762 m Return
26 m
Moderate track
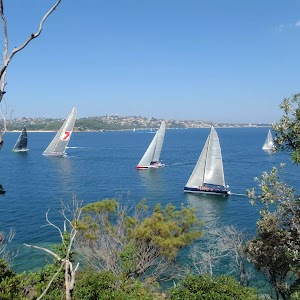
On this walk you will explore the historic northern or ‘inner’ Middle Head fortification battery. You can explore the trenches, tunnels and rooms of the fortifications on the less busy gun emplacements on Middle Head. The vegetation, water, cliff and harbour views are also spectacular and well worth spending a bit of time to carefully explore and soak up the sites.


(0km) Cobblers Beach Trail trackhead → Int. Old Fort and Govenors Rds
70 m
1 mins
0m
-3m
Very easy
From the Cobblers Beach Trail track head (beside the car park[1] near the end of Middle Head Rd,
Mosman[2]), this walk heads to the very end of Middle Head Rd towards the sandstone wall[3]. After 50m the walk heads over the bridged ‘Middle Head Moat’[4][5], then around the boom gate to come to a signposted intersection with ‘Old Fort Rd’ and ‘Govenors Rd’[6]. (There is a public toilet
Mosman[2]), this walk heads to the very end of Middle Head Rd towards the sandstone wall[3]. After 50m the walk heads over the bridged ‘Middle Head Moat’[4][5], then around the boom gate to come to a signposted intersection with ‘Old Fort Rd’ and ‘Govenors Rd’[6]. (There is a public toilet
in the sandstone building the right)
(0.07km) Int. Old Fort and Govenors Rds → Int. Govenors Rd and Inner Forts Trk
140 m
2 mins
0m
-4m
Easy track
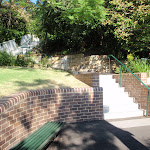
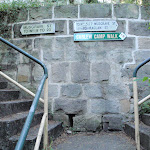
Veer left: From the intersection, this walk follows the ‘Govenors Rd’ [7] and ‘Soldiers Institute’[8] signs gently uphill along the sealed Governors Rd. The road leads uphill for 130m past a few historic barrack buildings to where the road bends (sharply right). Here the walk continues straight (gently downhill), across the gravel area (marked with an arrow post at the end of the white metal pole fence[9]).
(0.2km) Int. Govenors Rd and Inner Forts Trk → Inner Forts intersection
110 m
2 mins
1m
0m
Moderate track
Turn left: From the intersection, this walk follows the ‘Inner Middle Head Forts’ sign[10] along the mostly flat dirt track (away from the road) for about 90m to come to an unsignposted intersection with another track and a sandstone fort (on the right).
(0.31km) Inner Forts intersection → Disappearing Gun Pit North
70 m
2 mins
0m
-18m
Moderate track
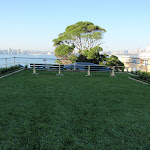
Continue straight: From the intersection, this walk heads along the clear dirt track[11] towards the distant water view between two long sandstone trenches[12]. After 60m this walk heads across the grassy section[13] to come to the top edge of the northern Disappearing Gun Pit

[14][15] beside the ocean cliffs[16]. Take extra care as the ground slopes towards the gun pit and cliff edges – stay 2 body lengths back from any significant drop.
Inner Middle Head Battery
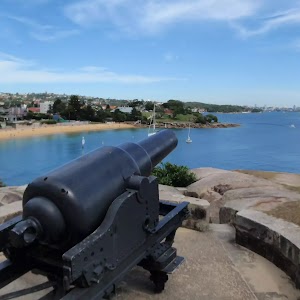
The inner Middle Head battery, is about 300m north of the main fortification area on Middle Head, Sydney Harbour National Park. The area has a number of fortifications, tunnels and hiding gun placement[17][18]. There are trenches leading down to some tunnels. Some of the tunnels are locked [19] with horizontal bar gates to protect the nesting sites of microbats that have taken up residence in the fortifications. The view of the harbour are stunning and the history interesting and worth exploring. Take great care around the cliffs and gun emplacements staying two full body lengths back from significant drops to avoid injury.
Maps for the Inner Middle Head Battery walk walk
You can download the PDF for this walk to print a map.
These maps below cover the walk and the wider area around the walk, they are worth carrying for safety reasons.
| Sydney Heads | 1:25 000 Map Series | 91302N SYDNEY HEADS | NSW-91302N |
| Sydney | 1:100 000 Map Series | 9130 SYDNEY | 9130 |
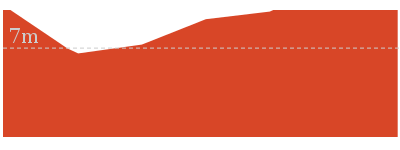
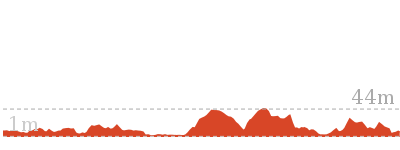
Cross sectional view of the Inner Middle Head Battery walk bushwalking track
Analysis and summary of the altitude variation on the Inner Middle Head Battery walk
Accessibility summary information for the Inner Middle Head Battery walk
Parking: There are 0 designated accessible parking areas on this walk.
Toilets: There are 0 designated accessible toilets on this walk.
Seats: There are 0 places to sit on this walk.
Hazards: There are 1 specific noteable accessability related hazards on this walk.
Trip Hazard Ground is rough and slopes moderately steeply down to unfenced drop into gun emplcement. Significant unfenced fall risk. Found about 370m into the walk.
Accessibility Details
Found 70m into this walk

Overview of this walks grade – based on the AS 2156.1 – 2001
Under this standard, a walk is graded based on the most difficult section of the walk.
| Length | 762 m | ||
| Time | 30 mins | ||
| . | |||
| Grade 3/6 Moderate track |
AS 2156.1 | Gradient | Short steep hills (3/6) |
| Quality of track | Formed track, with some branches and other obstacles (3/6) | ||
| Signs | Directional signs along the way (3/6) | ||
| Experience Required | No experience required (1/6) | ||
| Weather | Weather generally has little impact on safety (1/6) | ||
| Infrastructure | Limited facilities, not all cliffs are fenced (3/6) |
Some more details of this walks Grading
Here is a bit more details explaining grading looking at sections of the walk
Gradient
200m of this walk is flat with no steps and another 110m has gentle hills with occasional steps. The remaining (70m) has short steep hills.
Quality of track
210m of this walk follows a clear and well formed track or trail and another 110m follows a formed track, with some branches and other obstacles. The remaining (65m) follows a smooth and hardened path.
Signs
Around 270m of this walk is clearly signposted, whilst the remaining 110m has directional signs at most intersection.
Experience Required
This whole walk, 380m requires no previous bushwalking experience.
weather
This whole walk, 380m is not usually affected by severe weather events (that would unexpectedly impact safety and navigation).
Infrastructure
Around 200m of this walk is close to useful facilities (such as fenced cliffs and seats), whilst the remaining 180m has limited facilities (such as not all cliffs fenced).
Similar walks
A list of walks that share part of the track with the Inner Middle Head Battery walk walk.
664 m Return
30 mins
Easy track
1.9 km Circuit
1 Hr
Moderate track
3.9 km Circuit
2 hrs
Hard track
4.9 km Circuit
2 hrs 30 mins
Moderate track
6.1 km One way
2 hrs 30 mins
Hard track
Other Nearby walks
A list of walks that start near the Inner Middle Head Battery walk walk.
930 m Return
30 mins
Hard track
4.3 km One way
2 hrs 30 mins
Hard track
904 m Return
30 mins
Easy track
144 m Return
7 mins
Very easy
1.7 km Return
1 Hr
Moderate track
842 m Return
30 mins
Moderate track
1.7 km Return
1 Hr
Moderate track
200 m Return
30 mins
Moderate track
2 km Return
1 Hr
Moderate track
60 m Return
3 mins
Moderate track
358 m Return
15 mins
Easy track
992 m Return
30 mins
Moderate track
Plan your trip to and from the walk here
The Inner Middle Head Battery walk walk starts and ends at the Cobblers Beach Trail trackhead (gps: -33.826961, 151.2643)
Your transport options to Cobblers Beach Trail trackhead are by;
![]() Bus. (get details)
Bus. (get details)
![]() Car. Parking fees apply in the area.
Car. Parking fees apply in the area.
(get details)
Short URL = http://wild.tl/imhbw
Gallery images
There are other downloads I am still working on.
You will probably need to login to access these — still all free.
* KML (google earth file)
* GPX (GPS file)
Special Maps/ brochures
* A3 topo maps
* PDF with Lands Topo map base
* PDF with arial image (and map overlay)
I wanted to get the main site live first, this extra stuff will come in time.
Happy walking
Matt 🙂
Arabanoo Lookout
And Walk
Arabanoo Lookout

15 mins
142 m Return
5 m
Very easy
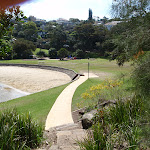
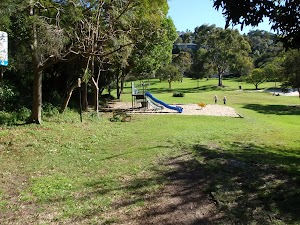
This short and easy walk leads from Tania Park to wonderful views of Arabanoo Lookout. The views over North Head and the water are wonderful. There is a concrete path leading the whole way and two seats at the top waiting for you to soak up the views. Tania Park can get busy on weekends with sport and walkers. A lovely walk if you are in the area. There are toilets, picnic area and playground at the far end of the Oval.


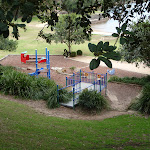
Tania Park

Tania Park is home to a large oval[1], and is found on Dobroyd Scenic Dr, Balgowlah Heights. This oval can be accessed on the Manly to Spit walking track and is home to the start of the Arabanoo Lookout path. The oval has basic facilities at the western edge such as toilets[2][3], children’s playground [4], drinking water [5], BBQ [6] and picnic tables [7].
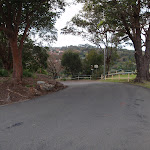
(0km) Dobroyd Scenic Drive → Arabanoo Lookout
70 m
1 mins
0m
-5m
Very easy
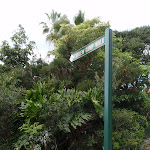
From the car parking bays on the north eastern edge of Tania Park on Dobroyd Scenic Dr, Balgowlah Heights[8] this walk heads towards the ‘Arabanoo Lookout’ sign[9]. From the edge of the road, this walk follows the (1.5m wide) concrete footpath, directly away from the oval and road, gently uphill[10], initially passing the ‘Arabanoo’ information sign[11][12]. About 35m from the road this walk comes to the fenced (1.2m high) lookout area[13], and seats

.
Arabanoo Lookout

Arabanoo Lookout provides great views over Port Jackson, North Harbour and to Manly. The lookout also has some interesting information signs and plarques[14][15][16][17][18] providing information on the significance of the area. There are two large stone seats
at the lookout.
This lookout is named after Arabanoo, an Aboriginal man kidnapped in December 1788, by British marines on Governor Phillips orders. The Governor believed that this was justified as he wished to facilitate communication between the British and the Aborigines. Arabanoo lived in the company of the Europeans until the 18th May 1789 where he died due to smallpox infection.
Maps for the Arabanoo Lookout walk
You can download the PDF for this walk to print a map.
These maps below cover the walk and the wider area around the walk, they are worth carrying for safety reasons.
| Sydney Heads | 1:25 000 Map Series | 91302N SYDNEY HEADS | NSW-91302N |
| Sydney | 1:100 000 Map Series | 9130 SYDNEY | 9130 |
Cross sectional view of the Arabanoo Lookout bushwalking track
Analysis and summary of the altitude variation on the Arabanoo Lookout
Accessibility summary information for the Arabanoo Lookout
Parking: There are 0 designated accessible parking areas on this walk.
Toilets: There are 0 designated accessible toilets on this walk.
Seats: There are 2 places to sit on this walk.
They are 70m apart.
Hazards: There are 0 specific noteable accessability related hazards on this walk.
Toilets: There are 0 designated accessible toilets on this walk.
Seats: There are 2 places to sit on this walk.
They are 70m apart.
Hazards: There are 0 specific noteable accessability related hazards on this walk.
Accessibility Details


Overview of this walks grade – based on the AS 2156.1 – 2001
Under this standard, a walk is graded based on the most difficult section of the walk.
| Length | 142 m | ||
| Time | 15 mins | ||
| . | |||
| Grade 1/6 Very easy |
AS 2156.1 | Gradient | Flat, no steps (1/6) |
| Quality of track | Smooth and hardened path (1/6) | ||
| Signs | Clearly signposted (1/6) | ||
| Experience Required | No experience required (1/6) | ||
| Weather | Weather generally has little impact on safety (1/6) | ||
| Infrastructure | Generally useful facilities (such as fenced cliffs and seats) (1/6) |
Some more details of this walks Grading
Here is a bit more details explaining grading looking at sections of the walk
Gradient
This whole walk, 70m is flat with no steps.
Quality of track
This whole walk, 70m follows a smooth and hardened path.
Signs
This whole walk, 70m is clearly signposted.
Experience Required
This whole walk, 70m requires no previous bushwalking experience.
weather
This whole walk, 70m is not usually affected by severe weather events (that would unexpectedly impact safety and navigation).
Infrastructure
This whole walk, 70m is close to useful facilities (such as fenced cliffs and seats).
Similar walks
A list of walks that share part of the track with the Arabanoo Lookout walk.
9.1 km One way
3 hrs 45 mins
Moderate track
Other Nearby walks
A list of walks that start near the Arabanoo Lookout walk.
2.5 km Circuit
1 Hr
Hard track
3.6 km Return
2 hrs
Moderate track
60 m Return
3 mins
Moderate track
1.7 km Return
1 Hr
Moderate track
200 m Return
30 mins
Moderate track
2 km Return
1 Hr
Moderate track
3.6 km Circuit
1 hr 30 mins
Hard track
22.6 km One way
9 hrs 45 mins
Hard track
6.1 km One way
2 hrs 30 mins
Hard track
13.7 km One way
5 hrs 45 mins
Moderate track

8.7 km Circuit
4 hrs
Moderate track
762 m Return
30 mins
Moderate track
Plan your trip to and from the walk here
The Arabanoo Lookout walk starts and ends at the Dobroyd Scenic Drive (gps: -33.808363, 151.2688)
Your main transport option to Dobroyd Scenic Drive is by;
![]() Car. There is free parking available.
Car. There is free parking available.
(get details)
Short URL = http://wild.tl/al
Gallery images
There are other downloads I am still working on.
You will probably need to login to access these — still all free.
* KML (google earth file)
* GPX (GPS file)
Special Maps/ brochures
* A3 topo maps
* PDF with Lands Topo map base
* PDF with arial image (and map overlay)
I wanted to get the main site live first, this extra stuff will come in time.
Happy walking
Matt 🙂
Taronga Zoo to Camp Curlew
And Walk
Taronga Zoo to Camp Curlew

30 mins
930 m Return
61 m
Moderate track
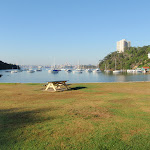
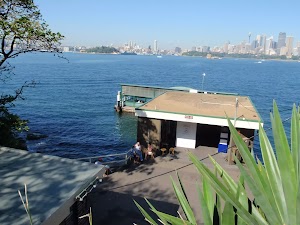
This track takes you from Taronga Zoo Ferry, directly to Camp Curlew. A perfect little walk for the Impressionist wanting to recreate the attraction to Camp Curlew for painting. Little Sirius Cove is a secluded beach, worth the short sidetrip. Camp Curlew is a secluded spot on Sydney Harbour and has historically been used as a retreat by artists.


(0km) Taronga Zoo Wharf → Int. Borogegal Walking Trail and Curlew Camp Trk
340 m
9 mins
26m
-22m
Moderate track
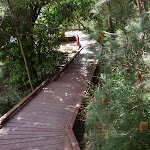
From the entrance to Taronga Zoo wharf, this walk heads down and across the cul-de-sac at the bottom of the road. The walk then follows the footpath around the building on the right to soon come to a section of boardwalk. The walk continues along boardwalked sections with a tall barbed-wire fence on the right. After a short time, the track turns left, above a small beach, then turns right and continues along the fenceline to the intersection with Camp Curlew on the left.
(0.34km) Int. Borogegal Walking Trail and Curlew Camp Trk → Little Sirius Cove
60 m
1 mins
0m
-5m
Moderate track
Turn left : From the intersection, the walk heads down the steps, winding slightly for a short time to the beach. At the end of this side trip, retrace your steps back to the main walk then Turn left.
(0.34km) Int. Borogegal Walking Trail and Curlew Camp Trk → Camp Curlew
120 m
2 mins
2m
-11m
Moderate track
Continue straight: From the intersection, this walk heads down the hill following the ‘Welcome to Curlew Camp’ sign. The track quickly turns right, over a boardwalk, then turns left down more stairs. The walk then winds down the hill to the corner of a large rock, just above the water.
Continue straight: From the intersection, this walk heads down towards the water and onto the wooden platform.
Continue straight: From the intersection, this walk heads down towards the water and onto the wooden platform.
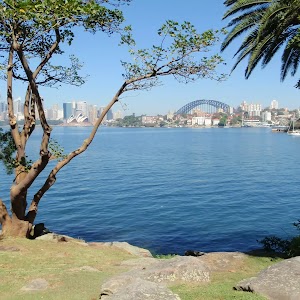
Camp Curlew
Camp Curlew was created in 1890 as an artists’ retreat, as was popular at the time. Artists of the day would visit for long periods (although women were not permitted to stay overnight), enjoying the surrounds and painting some of Australia’s most prized works. Arthur Streeton is a notable artist who stayed at the camp. The site was less than rustic, with tents to accommodate billiards and dining, and also a hired cook and youth to help with odd jobs. Camp Curlew was abandoned after the siting of Taronga Zoo in the area in 1912.
Maps for the Taronga Zoo to Camp Curlew walk
You can download the PDF for this walk to print a map.
These maps below cover the walk and the wider area around the walk, they are worth carrying for safety reasons.
| Parramatta River | 1:25 000 Map Series | 91303N PARRAMATTA RIVER | NSW-91303N |
| Sydney | 1:100 000 Map Series | 9130 SYDNEY | 9130 |
Cross sectional view of the Taronga Zoo to Camp Curlew bushwalking track
Analysis and summary of the altitude variation on the Taronga Zoo to Camp Curlew
Overview of this walks grade – based on the AS 2156.1 – 2001
Under this standard, a walk is graded based on the most difficult section of the walk.
| Length | 930 m | ||
| Time | 30 mins | ||
| . | |||
| Grade 3/6 Moderate track |
AS 2156.1 | Gradient | Short steep hills (3/6) |
| Quality of track | Formed track, with some branches and other obstacles (3/6) | ||
| Signs | Clearly signposted (1/6) | ||
| Experience Required | No experience required (1/6) | ||
| Weather | Weather generally has little impact on safety (1/6) | ||
| Infrastructure | Generally useful facilities (such as fenced cliffs and seats) (1/6) |
Some more details of this walks Grading
Here is a bit more details explaining grading looking at sections of the walk
Gradient
Around 340m of this walk has short steep hills, whilst the remaining 120m has gentle hills with occasional steps.
Quality of track
340m of this walk follows a smooth and hardened path and another 110m follows a formed track, with some branches and other obstacles. The remaining (20m) follows a clear and well formed track or trail.
Signs
This whole walk, 470m is clearly signposted.
Experience Required
This whole walk, 470m requires no previous bushwalking experience.
weather
This whole walk, 470m is not usually affected by severe weather events (that would unexpectedly impact safety and navigation).
Infrastructure
This whole walk, 470m is close to useful facilities (such as fenced cliffs and seats).
Similar walks
A list of walks that share part of the track with the Taronga Zoo to Camp Curlew walk.
1.7 km One way
1 Hr
Moderate track

4.2 km One way
1 hr 45 mins
Moderate track
6.5 km Circuit
3 hrs 30 mins
Moderate track
9.8 km One way
4 hrs
Moderate track
Other Nearby walks
A list of walks that start near the Taronga Zoo to Camp Curlew walk.
3.7 km One way
1 hr 45 mins
Moderate track
4.4 km One way
2 hrs
Moderate track

3 km Circuit
1 hr 30 mins
Moderate track
6.8 km One way
3 hrs
Hard track

7 km Circuit
3 hrs
Moderate track

18.9 km One way
8 hrs
Hard track

10.4 km One way
5 hrs
Hard track
2.7 km Circuit
1 hr 15 mins
Easy track

2 km One way
45 mins
Easy track
478 m Return
15 mins
Easy track

548 m Circuit
20 mins
Moderate track
2.8 km One way
1 hr 30 mins
Moderate track

Plan your trip to and from the walk here
The Taronga Zoo to Camp Curlew walk starts and ends at the Taronga Zoo Wharf (gps: -33.84575, 151.23979)
Your transport options to Taronga Zoo Wharf are by;
![]() Ferry. (get details)
Ferry. (get details)
![]() Bus. (get details)
Bus. (get details)
![]() Car. There is free parking available.
Car. There is free parking available.
(get details)
Short URL = http://wild.tl/tztcc
Gallery images
There are other downloads I am still working on.
You will probably need to login to access these — still all free.
* KML (google earth file)
* GPX (GPS file)
Special Maps/ brochures
* A3 topo maps
* PDF with Lands Topo map base
* PDF with arial image (and map overlay)
I wanted to get the main site live first, this extra stuff will come in time.
Happy walking
Matt 🙂
Cremorne Point to Taronga Zoo
And Walk
Cremorne Point to Taronga Zoo

1 hr 45 mins
4.2 km One way
218 m
Moderate track
This delightful walk from Cremorne to Taronga Zoo enjoys stunning harbour views and a number of sites to explore along bushland and suburban tracks. Starting from Cremorne ferry wharf, there is an option for a closer look at Robertsons Point lighthouse before continuing around Cremorne Reserve into Mosmans Bay. The walk continues through Little Sirius Bay, and offers the chance to visit historic Camp Curlew before finishing at the scenic Taronga Zoo wharf. A great way to enjoy a few hours exploring this beautiful harbour.


Cremorne Point Ferry Wharf
Cremorne Point Ferry Wharf marks the first stop on the Mosman Ferry Service. The wharf is home to Sophie’s Place cafe, serving coffee, food and drinks[1]. A public phone, public toilets and a children’s playground can all be found within 100m of this wharf. More info.
(0km) Cremorne Point Ferry Wharf → Sophies Lookout
40 m
1 mins
2m
-1m
Easy track
Sophies Lookout
This unofficial lookout takes in sweeping views across Sydney Harbour, over top of Cremorne Point Wharf and ‘Sophie’s Place’ cafe. The lookout is dedicated to Sophie Vaillant[6], long-term proprietor of the cafe below.
(0.04km) Sophies Lookout → Robertsons Point Lookout
200 m
3 mins
0m
-8m
Easy track
Turn right: From the intersection, this walk heads along the footpath directly away from the house, heading towards the toilet block[7] and playground[8]. The path leads past this park area and heads into the bush, then passes a couple of information signs to find a concrete rock cairn, built for the ‘Clan of Donnachaidh’ in 1988[9] (each rock has its town of origin carved in it[10][11]). The walk then continues along the path past a picnic table (with views and some shade)[12] to find the lookout at Robertsons Point[13][14][15]. (There is a track with steps and ladder that continues further down to the very tip of the point[16] for the adventurous). At the end of this side trip, retrace your steps back to the main walk then Veer right.
Robertsons Point Lookout
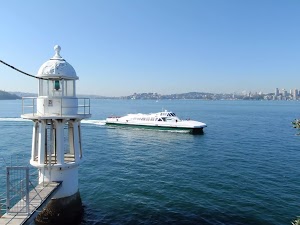
Robertsons Point, also known as Cremorne Point, is home to Cremorne Reserve. At the very tip, visitors can wander down some old steps[17] to the lighthouse[18], and the more adventurous can continue down a rather precarious ladder[19] to the water’s edge. The spectacular harbour views can be enjoyed from a number of bench seats[20][21]. A memorial plaque[22] reminds visitors to take extra care and respect the inherent dangers of the rocky coast.
(0.04km) Sophies Lookout → Elephants Ear
370 m
7 mins
13m
-9m
Very easy
Veer left: From the intersection, this walk heads along the footpath, keeping the houses to your left (that is, use the footpath on the far side of the houses from the wharf and road)[23]. The footpath leads behind the houses, enjoying the water views (on your right) and after about â250m, the path leads past a ‘The Illustrated Sydney News’ information sign[24]. Here the walk continues for a short time further to a clear three-way intersection[25] and a drinking fountain[26].
Elephants Ear
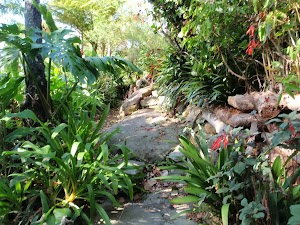
The Lex and Ruby Graham Garden at Cremorne Point is quite remarkable, worthy of a little extra time on your walk. A chance planting of a tropical ‘Elephant’s Ear’ bulb in 1959, which happened to thrive, led to a lifetime work for Lex Graham and his future wife, Ruby. They worked steadily for decades, clearing weeds and rubbish, improving the soil and building up the gardens with donated plants and cuttings[27].
(0.41km) Elephants Ear → Mosman Bay Marina
1.2 km
25 mins
46m
-56m
Easy track
Continue straight: From the intersection, this walk heads along the main foreshore track, keeping the house to your left[28]. The path almost immediately passes the northern end of the signposted ‘Elephant’s Ear’[29] garden and continues past some other exotic gardens behind the houses, whilst keeping the water views to your right. After ≈200m, the path leads to an information sign[30][31]about the constructed environment and then to a clearing with a sandstone rotunda. There is a four-way intersection[32] just above the ‘Sydney Amateur Sailing Club’ (on your right).
Continue straight: From the intersection, this walk follows the ‘Old Cremorne Wharf’ sign[33] sign gently uphill along the path, keeping the water to your right. The path soon comes to another intersection where this walk tends right[34], following the path for about 120m (passing a few informal side tracks[35][36]) to find some large sandstone boulders[37] and the entrance to the ‘Old Cremorne’ Ferry Wharf[38][39].
Turn left: From the Old Cremorne Ferry Wharf[40] entrance, this walk follows the footpath away from the power lines[41] keeping the water to your right[42]. The path leads up the hill and after ≈180m, the path heads up a set of steps. The path continues to enjoy water views[43][44] (to your right), passing behind a row of houses[45]. Soon the path bends left to pass a ‘Cremorne Point’ sign[46] and find a clear three-way intersection and a bench seat[47].
Turn right: From the intersection, this walk follows the ‘Bromley Ave’ sign[48] along the footpath (not actually a road) between the row of houses to find a four-way intersection[49] at the last house, number five[50].
Continue straight: From 5 Bromley Ave[51], this walk heads down the steps[52][53] and follows the path to cross the timber bridge[54] over the valley. The walk bends right and follows the path for ≈250m, enjoying the water views to your right[55]. The path then passes a ‘Harnett Park’ sign[56] (and ignores the upper track on your left), then heads down some steps and turns left. The walk heads past the ‘Rowers Restaurant’[57] to a car park and the Mosman Bay Marina[58].
Rowers Restaurant
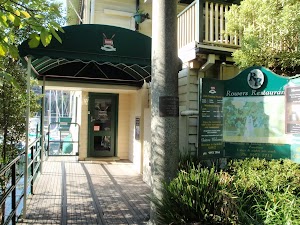
Located deep in Mosmans Bay, the Rowers Restaurant is part of Mosman Rowers Club (distinct from Mosman Rowing Club at the Spit), between Mosman Marina and Sea Scouts Hall. Open to the public, the club houses a bistro, restaurant and bar, which are open for lunch and dinner daily, as well as breakfast on Sundays. For more information, call 9953 7966. More info.
(1.57km) Mosman Bay Marina → Mosman Bay Ferry Wharf
400 m
7 mins
7m
-6m
Very easy
Continue straight: From Mosman Bay Marina[59], this walk follows the waterside footpath, keeping the water to your right[60]. The path soon bends right to round to the apex of Mosmans Bay[61] opposite ‘Reid Park’[63] and a children’s playground[64]. Here the walk continues around the bay and after ≈110m, comes to a large rock[65] commemorating ‘H.M.S Sirius’[66]. The walk then continues ≈90m to the bush shelter[67] and the entrance to Mosman Bay Ferry Wharf[68].
Mosman Bay Ferry Wharf and Shops
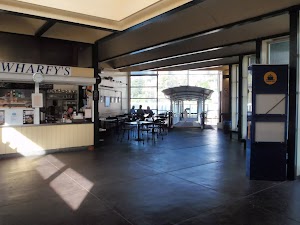
Mosman Bay ferry wharf, located on Avenue Rd, is nestled in the deep Mosmans Bay, opposite the marina. The wharf houses Wharfy’s cafe[70]. Open weekdays 7am-2pm and weekends 7am-4pm, for more information call (02) 9968-3569.
Across the road is Mosman Wharf Store, selling groceries and snacks, newspapers, bait and travel tickets[71]. Open weekdays 7am-7pm, Sat 8am-6pm & Sun 8am-2pm, for more information, call (02) 9969 9369.
Across the road is Mosman Wharf Store, selling groceries and snacks, newspapers, bait and travel tickets[71]. Open weekdays 7am-7pm, Sat 8am-6pm & Sun 8am-2pm, for more information, call (02) 9969 9369.
(1.96km) Mosman Bay Ferry Wharf → South Mosman Wharf
610 m
14 mins
40m
-33m
Moderate track
Turn left: From Mosman Bay Ferry Wharf, this walk heads up the steps opposite the wharf, next to the ‘Mosman Wharf Store’[72]. This path continues up the hill and up some more steps[73], and then crosses a minor road and heads up a ramp[74]. Here the walk turns right and follows Mosman St[75]. Mosman St soon bends left (and becomes Trumfield Lane) which continues up the hill[76] to a ‘T’ intersection with McLeod St. This walk crosses McLeod St to find a driveway[77] (just a bit to the right) and turns left, following the steps and footpath up the hill[78]. This footpath soon leads to an intersection with Musgrave Street[79].
Turn right: From the intersection, this walk heads downhill along ‘Musgrave St’[80] towards the distant water views. At the end of the street, the walk comes to a turning area[81], bus stop, shelter[82] and the entrance to the ‘South Mosman Wharf’[83].
Turn right: From the intersection, this walk heads downhill along ‘Musgrave St’[80] towards the distant water views. At the end of the street, the walk comes to a turning area[81], bus stop, shelter[82] and the entrance to the ‘South Mosman Wharf’[83].
(2.57km) South Mosman Wharf → Curraghbeena Point
90 m
2 mins
18m
0m
Moderate track
Continue straight: From the shelter at the entrance to South Mosman Wharf, this walk heads downhill to soon turn left and heads up the steps next to the ‘Exploring Curlew Camp Artists’ Walk’ sign[84]. Soon the walk turns right at the ‘T’ intersection[85] partway up the stairs then continues up ignoring the private property side paths to find the end of a short road[86]. Here the walk follows the road to the intersection with Raglan St and the ‘Curraghbeena Point Lookout’[87] in front of ‘The Castle’[88].
Curraghbeena Point Lookout
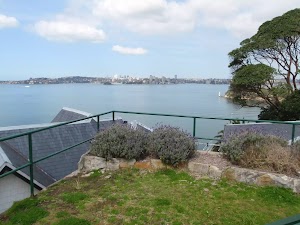
Curraghbeena Point separates Little Sirius Cove from Mosmans Bay (formerly Sirius Cove). This well-kept little park at the point offers some lovely views over Sydney Harbour, with two bench seats and a drinking fountain nestled amongst the buildings.
(2.66km) Curraghbeena Point → End of Curraghbeena Rd
400 m
9 mins
24m
-17m
Moderate track
Turn left: From ‘Curraghbeena Point Lookout’[89][90], this walk heads up the hill following Raglan Street soon passing ‘Herron Park’[91] (on your left) then just before the sandstone wall (on the right) this walk turn right into the sandstone driveway then follows the ‘Public Path’ sign[92] up the steps. At the top the path passes beside a house and then follows a short section of Raglan St to turn right into Curraghbeena Rd (near the playground[93] and park). Here the walk heads down Curraghbeena Rd passing a lookout (on your right)[94][95] and continues down the road to the very end where there is an intersection with a walking track and steps[96].
(3.07km) End of Curraghbeena Rd → No. 4 Curlew Camp Rd
160 m
6 mins
10m
-30m
Moderate track
Turn right: From the end of Curraghbeena Road[97], the walk follows the ‘Curlew Camp Walk’ sign[98] down the stairs next to the sandstone wall[99] towards the water. at the bottom of these steps the walk comes to a telegraph pole and great unfenced water view[100]. Here the walk turns left and follows a footpath behind the houses[101] then down a few timber stairs cases[102][103]. Here the walk follows the track through the bush to soon head up a few of steps onto Curlew Camp Road where there is a sign pointing back to ‘Walking track to Curraghbeena Road’[104].
(3.22km) No. 4 Curlew Camp Rd → Int. Illawarra St and Curlew Camp Rd
90 m
2 mins
3m
-7m
Very easy
(3.31km) Int. Illawarra St and Curlew Camp Rd → Sirius Cove Reserve
100 m
2 mins
0m
-8m
Easy track
Turn right: From the intersection, this walk heads down the series of steps and along the footpath beside the children’s playground. The walk then continues across the grassy clearing to the middle of Sirius Cove Reserve.
Sirius Cove Reserve
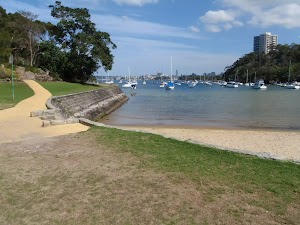
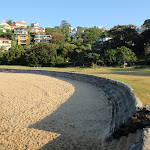
Sirius Cove Reserve is next to the sandy beach of Little Sirius Cove, Mosman. The reserve is open and grassy, with a few picnic tables, a fenced playground and drinking fountain at the western end, and a toilet block at the eastern end. The beach has no surf and faces south to Cremorne Point. Road access is via Sirius Cove Road.
(3.41km) Sirius Cove Reserve → Bottom of Whiting Beach Rd steps
250 m
5 mins
17m
-6m
Easy track
Veer right: From the intersection, this walk heads along the park foreshore with the water to your right, then heads up the hill bending right. The walk follows the footpath below some houses and past a small beach with a two-storey scout hall. Just after the last house, the path comes to a three-way intersection at the start of a large wall/fence. There is a ‘Curlew Camp’ sign pointing back to ‘Sirius Cove’[107].
(3.65km) Bottom of Whiting Beach Rd steps → Int. Borogegal Walking Trail and Curlew Camp Trk
240 m
6 mins
16m
-17m
Easy track
Continue straight: From the intersection, this walk follows the sign pointing to ‘Curlew Camp’[108], following the footpath beside the tall barbed wire fence and wall. The track leads over a few sections of boardwalk, and soon comes to an intersection (with a track on the right marked with another ‘Curlew Camp’ sign[109], pointing ‘130 metres’.
(3.89km) Int. Borogegal Walking Trail and Curlew Camp Trk → Camp Curlew
120 m
2 mins
2m
-11m
Moderate track
Turn right: From the intersection, this walk heads down the hill following the ‘Welcome to Curlew Camp’ sign. The track quickly turns right, over a boardwalk, then turns left down more stairs. The walk then winds down the hill to the corner of a large rock, just above the water.
Continue straight: From the intersection, this walk heads down towards the water and onto the wooden platform. At the end of this side trip, retrace your steps back to the main walk then Continue straight.
Continue straight: From the intersection, this walk heads down towards the water and onto the wooden platform. At the end of this side trip, retrace your steps back to the main walk then Continue straight.
Camp Curlew
Camp Curlew was created in 1890 as an artists’ retreat, as was popular at the time. Artists of the day would visit for long periods (although women were not permitted to stay overnight), enjoying the surrounds and painting some of Australia’s most prized works. Arthur Streeton is a notable artist who stayed at the camp. The site was less than rustic, with tents to accommodate billiards and dining, and also a hired cook and youth to help with odd jobs. Camp Curlew was abandoned after the siting of Taronga Zoo in the area in 1912.
(3.89km) Int. Borogegal Walking Trail and Curlew Camp Trk → Taronga Zoo Wharf
340 m
9 mins
22m
-26m
Moderate track
Turn left: From the intersection, this walk heads along the fenceline, with the water below on the right of the track. The walk heads along large sections of boardwalk with a tall barbed- wire fence above on the left. After approximately 300m, the track turns left above a small beach and then after the beach turns right. The walk continues along the hillside, with the tall fence on the left, then heads up boardwalked steps and passes a building on the left before crossing the cul-de-sac to Taronga Zoo wharf.
Maps for the Cremorne Point to Taronga Zoo walk
You can download the PDF for this walk to print a map.
These maps below cover the walk and the wider area around the walk, they are worth carrying for safety reasons.
| Parramatta River | 1:25 000 Map Series | 91303N PARRAMATTA RIVER | NSW-91303N |
| Sydney | 1:100 000 Map Series | 9130 SYDNEY | 9130 |
Cross sectional view of the Cremorne Point to Taronga Zoo bushwalking track
Analysis and summary of the altitude variation on the Cremorne Point to Taronga Zoo
Overview of this walks grade – based on the AS 2156.1 – 2001
Under this standard, a walk is graded based on the most difficult section of the walk.
| Length | 4.2 km | ||
| Time | 1 hr 45 mins | ||
| . | |||
| Grade 3/6 Moderate track |
AS 2156.1 | Gradient | Short steep hills (3/6) |
| Quality of track | Clear and well formed track or trail (2/6) | ||
| Signs | Clearly signposted (1/6) | ||
| Experience Required | No experience required (1/6) | ||
| Weather | Weather generally has little impact on safety (1/6) | ||
| Infrastructure | Limited facilities, not all cliffs are fenced (3/6) |
Some more details of this walks Grading
Here is a bit more details explaining grading looking at sections of the walk
Gradient
1.8km of this walk has gentle hills with occasional steps and another 1.3km has short steep hills. The remaining (1.2km) is flat with no steps.
Quality of track
Around 3.4km of this walk follows a smooth and hardened path, whilst the remaining 820m follows a clear and well formed track or trail.
Signs
This whole walk, 4.2km is clearly signposted.
Experience Required
This whole walk, 4.2km requires no previous bushwalking experience.
weather
This whole walk, 4.2km is not usually affected by severe weather events (that would unexpectedly impact safety and navigation).
Infrastructure
Around 4.1km of this walk is close to useful facilities (such as fenced cliffs and seats), whilst the remaining 160m has limited facilities (such as not all cliffs fenced).
Similar walks
A list of walks that share part of the track with the Cremorne Point to Taronga Zoo walk.
478 m Return
15 mins
Easy track
930 m Return
30 mins
Moderate track

1.7 km One way
1 Hr
Moderate track
2 km One way
45 mins
Easy track
2.7 km Circuit
1 hr 15 mins
Easy track
6.5 km Circuit
3 hrs 30 mins
Moderate track
9.8 km One way
4 hrs
Moderate track
Other Nearby walks
A list of walks that start near the Cremorne Point to Taronga Zoo walk.
3.7 km One way
1 hr 45 mins
Moderate track
4.4 km One way
2 hrs
Moderate track
3 km Circuit
1 hr 30 mins
Moderate track
6.8 km One way
3 hrs
Hard track
7 km Circuit
3 hrs
Moderate track
18.9 km One way
8 hrs
Hard track
10.4 km One way
5 hrs
Hard track
2.8 km One way
1 hr 30 mins
Moderate track

1.7 km Circuit
1 Hr
Moderate track

548 m Circuit
20 mins
Moderate track
1.7 km Return
1 Hr
Moderate track
842 m Return
30 mins
Moderate track
Plan your trip to and from the walk here
The Cremorne Point to Taronga Zoo walk starts at the Cremorne Point Ferry Wharf (gps: -33.847645, 151.23102)
Your transport options to Cremorne Point Ferry Wharf are by;
![]() Ferry. (get details)
Ferry. (get details)
![]() Bus. (get details)
Bus. (get details)
![]() Car. There is free parking available.
Car. There is free parking available.
(get details)
The Cremorne Point to Taronga Zoo ends at the Taronga Zoo Wharf (gps: -33.84575, 151.23979)
Your transport options to Taronga Zoo Wharf are by;
![]() Ferry. (get details)
Ferry. (get details)
![]() Bus. (get details)
Bus. (get details)
![]() Car. There is free parking available.
Car. There is free parking available.
(get details)
Short URL = http://wild.tl/cpttz
Gallery images
There are other downloads I am still working on.
You will probably need to login to access these — still all free.
* KML (google earth file)
* GPX (GPS file)
Special Maps/ brochures
* A3 topo maps
* PDF with Lands Topo map base
* PDF with arial image (and map overlay)
I wanted to get the main site live first, this extra stuff will come in time.
Happy walking
Matt 🙂
Taronga to Musgrave Wharf
And Walk
Taronga to Musgrave Wharf

1 Hr
1.7 km One way
111 m
Moderate track


(0km) Taronga Zoo Wharf → Int. Borogegal Walking Trail and Curlew Camp Trk
340 m
9 mins
26m
-22m
Moderate track
From the entrance to Taronga Zoo wharf, this walk heads down and across the cul-de-sac at the bottom of the road. The walk then follows the footpath around the building on the right to soon come to a section of boardwalk. The walk continues along boardwalked sections with a tall barbed-wire fence on the right. After a short time, the track turns left, above a small beach, then turns right and continues along the fenceline to the intersection with Camp Curlew on the left.
(0.34km) Int. Borogegal Walking Trail and Curlew Camp Trk → Camp Curlew
120 m
2 mins
2m
-11m
Moderate track
Continue straight: From the intersection, this walk heads down the hill following the ‘Welcome to Curlew Camp’ sign. The track quickly turns right, over a boardwalk, then turns left down more stairs. The walk then winds down the hill to the corner of a large rock, just above the water.
Continue straight: From the intersection, this walk heads down towards the water and onto the wooden platform. At the end of this side trip, retrace your steps back to the main walk then Turn left.
Continue straight: From the intersection, this walk heads down towards the water and onto the wooden platform. At the end of this side trip, retrace your steps back to the main walk then Turn left.
Camp Curlew
Camp Curlew was created in 1890 as an artists’ retreat, as was popular at the time. Artists of the day would visit for long periods (although women were not permitted to stay overnight), enjoying the surrounds and painting some of Australia’s most prized works. Arthur Streeton is a notable artist who stayed at the camp. The site was less than rustic, with tents to accommodate billiards and dining, and also a hired cook and youth to help with odd jobs. Camp Curlew was abandoned after the siting of Taronga Zoo in the area in 1912.
(0.34km) Int. Borogegal Walking Trail and Curlew Camp Trk → Sirius Cove Reserve
480 m
11 mins
23m
-33m
Easy track
Turn right: From the intersection, this walk heads along clear track, following the tall fence (keeping the fence to your right). The track passes over a few section of boardwalk and soon comes to a three-way intersection at the end of the long fence/wall marked with a sign pointing back to ‘Curlew Camp’[3] (and a set of steps on your right).
Continue straight: From the intersection, this walk follows the ‘Curlew Camp’ sign pointing to ‘Sirius Cove’[4], keeping the water glimpse to your left. The path leads behind some house and past a two-storey scout hall on the beach below (on your left). The path continues and soon winds down to Sirius Cove Reserve.
Continue straight: From the intersection, this walk follows the ‘Curlew Camp’ sign pointing to ‘Sirius Cove’[4], keeping the water glimpse to your left. The path leads behind some house and past a two-storey scout hall on the beach below (on your left). The path continues and soon winds down to Sirius Cove Reserve.
Sirius Cove Reserve
Sirius Cove Reserve is next to the sandy beach of Little Sirius Cove, Mosman. The reserve is open and grassy, with a few picnic tables, a fenced playground and drinking fountain at the western end, and a toilet block at the eastern end. The beach has no surf and faces south to Cremorne Point. Road access is via Sirius Cove Road.
(0.82km) Sirius Cove Reserve → Int. Illawarra St and Curlew Camp Rd
100 m
2 mins
8m
0m
Easy track
Veer left: From the middle of the park, this walk heads across grassy clearing (keeping the water to your left) past the front of the children’s playground. The walk then follows the footpath behind the playground up a series of steps to the intersection of Illawarra St and Curlew Camp Rd.
(0.92km) Int. Illawarra St and Curlew Camp Rd → No. 4 Curlew Camp Rd
90 m
2 mins
7m
-3m
Very easy
Turn left : From the intersection, this walk heads down the hill following the ‘VERY SLOW’ and the ‘Curlew Camp Rd’ signs[5] along the concrete road. The narrow road soon leads to an intersection with a track on your left marked with a ‘Walking track to Curraghbeena Road’ sign[6], until opposite No. 4’s driveway[7].
(1.01km) No. 4 Curlew Camp Rd → End of Curraghbeena Rd
160 m
6 mins
30m
-10m
Moderate track
Turn left: From the intersection, this walk follows the ‘Walking track to Curraghbeena Road’ sign[8] down the steps and along the bush track. The track soon leads up a few timber stairs cases[9][10] to then follows a footpath behind the houses[11] to come to a telegraph pole and great unfenced water view[12]. Here the walk turns left and continues along the footpath up the steps[13] to come to the end of Curraghbeena Road[14].
(1.17km) End of Curraghbeena Rd → South Mosman Wharf
490 m
11 mins
17m
-42m
Moderate track
Turn left: From the end of Curraghbeena Rd, this walk heads along Curraghbeena Rd[15]. The road soon bends right, and heads up the hill, passing between a lookout (on your the left)[16][17] and a playground[18] (on your right) to come to Raglan St. Here the walk turns left and heads along the upper[19] Raglan St to then follow the ‘Public Path’ sign[20] beside the house and down the steps[21][22]. The walk continues down Raglan St past ‘Herron Park’[23] (on your right) to find the large sandstone ‘The Castle’ building[24] on your left and the ‘Curraghbeena Point Lookout’[25][26] at the top of a few steps.
Turn right: From ‘Curraghbeena Point Lookout’[27], this walk walk heads downhill directly away from the front of ‘The Castle’[28] following the ‘To Musgrave St Ferry via Herron Walk’ sign[29]. At the end of the short street the walk heads down a series of steps [30] ignoring the private property paths but turning left at intersection part way down. The steps lead down to Musgrave St and an information sign[31][32]. Here the walk turns right to find the entrance to the ‘South Mosman Wharf’[33].
The walk then takes the footpath stairs, to the right of the cul-de-sac, down until arriving next to the entrance of South Musgrave Wharf. The walk heads up to South Musgrave Wharf.
Maps for the Taronga to Musgrave Wharf walk
You can download the PDF for this walk to print a map.
These maps below cover the walk and the wider area around the walk, they are worth carrying for safety reasons.
| Parramatta River | 1:25 000 Map Series | 91303N PARRAMATTA RIVER | NSW-91303N |
| Sydney | 1:100 000 Map Series | 9130 SYDNEY | 9130 |
Cross sectional view of the Taronga to Musgrave Wharf bushwalking track
Analysis and summary of the altitude variation on the Taronga to Musgrave Wharf
Overview of this walks grade – based on the AS 2156.1 – 2001
Under this standard, a walk is graded based on the most difficult section of the walk.
| Length | 1.7 km | ||
| Time | 1 Hr | ||
| . | |||
| Grade 3/6 Moderate track |
AS 2156.1 | Gradient | Short steep hills (3/6) |
| Quality of track | Clear and well formed track or trail (2/6) | ||
| Signs | Clearly signposted (1/6) | ||
| Experience Required | No experience required (1/6) | ||
| Weather | Weather generally has little impact on safety (1/6) | ||
| Infrastructure | Limited facilities, not all cliffs are fenced (3/6) |
Some more details of this walks Grading
Here is a bit more details explaining grading looking at sections of the walk
Gradient
990m of this walk has short steep hills and another 580m has gentle hills with occasional steps. The remaining (95m) is flat with no steps.
Quality of track
Around 840m of this walk follows a smooth and hardened path, whilst the remaining 820m follows a clear and well formed track or trail.
Signs
This whole walk, 1.7km is clearly signposted.
Experience Required
This whole walk, 1.7km requires no previous bushwalking experience.
weather
This whole walk, 1.7km is not usually affected by severe weather events (that would unexpectedly impact safety and navigation).
Infrastructure
Around 1.5km of this walk is close to useful facilities (such as fenced cliffs and seats), whilst the remaining 160m has limited facilities (such as not all cliffs fenced).
Similar walks
A list of walks that share part of the track with the Taronga to Musgrave Wharf walk.
930 m Return
30 mins
Moderate track
4.2 km One way
1 hr 45 mins
Moderate track
6.5 km Circuit
3 hrs 30 mins
Moderate track
9.8 km One way
4 hrs
Moderate track
Other Nearby walks
A list of walks that start near the Taronga to Musgrave Wharf walk.
3.7 km One way
1 hr 45 mins
Moderate track
4.4 km One way
2 hrs
Moderate track
3 km Circuit
1 hr 30 mins
Moderate track
6.8 km One way
3 hrs
Hard track
7 km Circuit
3 hrs
Moderate track
18.9 km One way
8 hrs
Hard track
10.4 km One way
5 hrs
Hard track
2.7 km Circuit
1 hr 15 mins
Easy track
2 km One way
45 mins
Easy track
478 m Return
15 mins
Easy track
548 m Circuit
20 mins
Moderate track
2.8 km One way
1 hr 30 mins
Moderate track
Plan your trip to and from the walk here
The Taronga to Musgrave Wharf walk starts at the Taronga Zoo Wharf (gps: -33.84575, 151.23979)
Your transport options to Taronga Zoo Wharf are by;
![]() Ferry. (get details)
Ferry. (get details)
![]() Bus. (get details)
Bus. (get details)
![]() Car. There is free parking available.
Car. There is free parking available.
(get details)
The Taronga to Musgrave Wharf ends at the South Mosman Wharf (gps: -33.843208, 151.23294)
Your transport options to South Mosman Wharf are by;
![]() Ferry. (get details)
Ferry. (get details)
![]() Bus. (get details)
Bus. (get details)
![]() Car. There is free parking available.
Car. There is free parking available.
(get details)
Short URL = http://wild.tl/ttmw
Gallery images
There are other downloads I am still working on.
You will probably need to login to access these — still all free.
* KML (google earth file)
* GPX (GPS file)
Special Maps/ brochures
* A3 topo maps
* PDF with Lands Topo map base
* PDF with arial image (and map overlay)
I wanted to get the main site live first, this extra stuff will come in time.
Happy walking
Matt 🙂
Balmoral Beach to The Spit
And Walk
Balmoral Beach to The Spit

2 hrs 30 mins
4.3 km One way
85 m
Hard track
This walks follows the coast from Balmoral to the Spit and across Spit Bridge. There are some alternate tracks to consider at high-tides, which take the streets over the headlands. Balmoral and Chinamans Beaches are very nice places for lunch and a swim. Allows time to wander and explore. There are plenty of options for swimming.


(0km) Balmoral Park car park → Rocky Point Bridge
860 m
14 mins
5m
-9m
Easy track
From Balmoral Park car park, this walk heads onto the beach and follows along it, past the pipe and wharf, then continues up the beach to then head up the stairs onto the bridge, connecting the small rocky island to the promenade above the beach.
Balmoral Beach

Balmoral Beach takes its name from the royal castle at Braemar in Scotland. This is a beautiful beach, with a great foreshore walk overlooking the sandy beach. The beach is a popular spot with locals and visitors, for sun baking, swimming and having a picnic. Balmoral Beach has very little surf, with a sheltered, easterly aspect. There is also a shark-net swimming area, toilets, shops, cafes and plenty of beach to share on a sunny day.
(0.86km) Rocky Point Bridge → Rocky Point
110 m
2 mins
0m
-1m
Moderate track
Turn right: From the intersection, this walk heads up the hill towards the sea. The walk passes a few bench seats and bins on the way out to the edge of the point. At the end of this side trip, retrace your steps back to the main walk then Turn right.
(0.86km) Rocky Point Bridge → Int. Wyargine Reserve Trk and Balmoral Beach
480 m
8 mins
8m
-3m
Moderate track
Continue straight: From the bridge, this walk heads along the beach to the north, keeping the sea to the right, towards the headland. The walk heads along the beach for approximately 200m, to the intersection just off the beach, past the last beachfront house.
(1.33km) Int. Wyargine Reserve Trk and Balmoral Beach → Chinamans Beach Reserve South
850 m
18 mins
42m
-43m
Moderate track
Veer left: From the intersection just behind the beach, this walk winds up stairs away from the beach, to a rocky outcrop where the track turns. The walk then continues up the hill to meet the signposted intersection at the end of Stanton Rd.
Continue straight: From the intersection, this walk heads up the road following ‘Stanton Rd’ then ‘Burran Ave’ signs, to veer left onto Hopetoun Ave. The walk soon passes Kirk Oswald Ave (off to the left). After a while the road again splits into two levels, opposite the intersection of Armitage Rd.
Turn right: From the intersection, this walk heads down the hill, following the sign ‘Armitage Lane’ along the road, and around to the left into Rosherville Rd. The walk continues along the footpath, passing a large boulder and a bench on the right before winding down behind the playground in Rosherville Reserve. The track passes the playground, taking the closest access track to the southern end of Chinamans Beach. Now Turn sharp left to rejoin the main walk .
(1.33km) Int. Wyargine Reserve Trk and Balmoral Beach → Chinamans Beach Reserve South
840 m
16 mins
24m
-25m
Hard track
Turn right: (This section is only possible at low tide and with calm seas.) From the intersection, this walk heads away from the houses and towards the rockshelf, keeping the bush on the left. The walk keeps the water to the right as it weaves around the rockshelf for approximately 500m, to some boat sheds with rail tracks into the water. From these boat sheds, the walk continues to follow the rocky headland to the beach.
Chinamans Beach and Reserve
Chinamans Beach and Reserve are wonderful places to have a picnic or a swim, with lots of areas to sit in the sun or shade beside the clear water. The beach does not provide any surf with its north-easterly aspect, but is perfect for launching your kayak or boat into the harbour. Chinamans Reserve has some parking, play equipment, toilets and road access by McLean Cres.
(2.17km) Chinamans Beach Reserve South → Int. Grecia Lane Trk and Chinamans Beach Reserve North
230 m
4 mins
4m
-5m
Moderate track
Turn right: From the end of the beach, this walk heads along the sand, keeping the water to the right, until near the middle of Chinamans Beach. A wood-railed track heads off to the toilet block on the left, marking the intersection.
Continue straight: From the intersection, this walk heads along the beach with the water to the right. The walk leads to the stairs at the end of the beach.
Continue straight: From the intersection, this walk heads along the beach with the water to the right. The walk leads to the stairs at the end of the beach.
(2.4km) Int. Grecia Lane Trk and Chinamans Beach Reserve North → Int. Middle Harbour Yacht Club car park and Spit Rd
1.1 km
25 mins
55m
-56m
Moderate track
Turn left: From the base of the stairs (at the northern end of Chinamans Beach), this walk heads up the stairs away from the beach, to the intersection with Cyprian St. The track heads to the right, up Cyprian St, to the intersection with Parriwi Rd. At Parriwi Rd, the walk turns right, around the railing and up the hill. The walk continues along Parriwi Rd for some time, down to the intersection with Spit Rd. The walk continues along Spit Rd, to the driveway entry to Middle Harbour Yacht Club car park. Now Veer right to rejoin the main walk .
(2.4km) Int. Grecia Lane Trk and Chinamans Beach Reserve North → Middle Harbour Yacht Club entrance
860 m
16 mins
18m
-19m
Hard track
Veer right: From the intersection, this walk heads along the rocky shoreline with the water to the right, as it weaves around the houses to a small beach. The walk continues over some sandy sections between the rocks for approximately 700m, to come to a large Sydney Water building, the Spit Syphon. The walk climbs onto the concrete platform of the Spit Syphon to continue along the road, passing ‘The Shores’ restaurant and a boat ramp. The walk continues past the Middle Harbour Yacht Club building to the main entrance facing the car park.
Spit Syphon
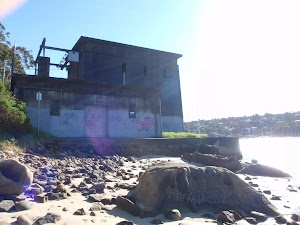
The Spit Syphon was built between 1922 and 1925 by the Public Works Department. It was necessary in order to pump sewage from the north without interfering with water transport. The building is styled with Egyptian influences as displayed by its tall, square concrete walls. More info.
(3.26km) Middle Harbour Yacht Club entrance → Spit Bridge South
360 m
6 mins
2m
-5m
Easy track
Veer left: From the entrance of Middle Harbour Yacht Club, this walk heads away from the buildings to the road.
Turn right: From the intersection, this walk heads along Spit Rd towards the bridge, keeping the shops on your right. The walk heads along the road to where it splits, to go over the bridge, opposite ‘Sydney Harbour Kayaks’.
Turn right: From the intersection, this walk heads along Spit Rd towards the bridge, keeping the shops on your right. The walk heads along the road to where it splits, to go over the bridge, opposite ‘Sydney Harbour Kayaks’.
Sydney Harbour Kayaks
Sydney Harbour Kayaks, at the southern end of the Spit Bridge, provide sales and rentals of kayaks. One hour in a single plastic kayak costs $20, and a double $40. The enterprise also provides tours of the harbour, catering for individuals through to large groups. For further information and bookings, contact: [email protected] or (02) 99604389 More info.
(3.62km) Spit Bridge South → Int. Spit Rd and Ellery’s Punt Reserve Road
350 m
6 mins
11m
-2m
Easy track
Continue straight: From the intersection, this walk heads over the Spit Bridge, with the road to the left of the footpath. The walk crosses the bridge to where it meets the road down to Ellery’s Punt Reserve, first on the right.
Spit Bridge
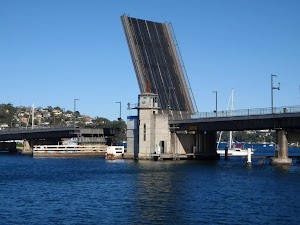
The Spit Bridge was originally built in 1924 to replace the punt service. The current Spit Bridge was built during the 1950’s. The bridge is a bascule bridge, as it’s middle section can be raised to allow tall ships through. This ability of the bridge does, however, stop traffic on a major arterial road, which has caused the bridge to be the centre of some controversy. The Spit Bridge carries the Spit Rd and the Manly Scenic Walkway.
(3.97km) Int. Spit Rd and Ellery’s Punt Reserve Road → Int. Ellery’s Punt Reserve Rd and Manly Scenic Walkway
100 m
2 mins
2m
-7m
Easy track
Veer right: From the intersection, this walk heads downhill away from the main road for approximately 20m to the intersection below the bridge, on the left.
Veer right: From the intersection, this walk heads down the hill towards the water. The walk soon comes to Ellery’s Punt Reserve car park on the right. This walk continues past this, down the footpath to the signposted intersection.
Veer right: From the intersection, this walk heads down the hill towards the water. The walk soon comes to Ellery’s Punt Reserve car park on the right. This walk continues past this, down the footpath to the signposted intersection.
Ellery’s Punt Reserve
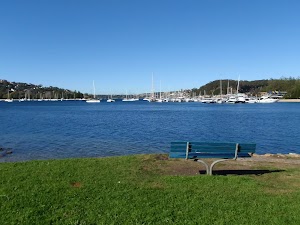
Ellery’s Punt Reserve is a very nice grassed area on the north eastern side of the Spit Bridge. The reserve has road access and parking, and seems to be a popular spot for fishing from the bank. There is also seating and shaded areas.
(4.07km) Int. Ellery’s Punt Reserve Rd and Manly Scenic Walkway → Int. Battle Boulevard and Manly Rd
230 m
5 mins
11m
0m
Moderate track
Turn right: From the ‘Manly Scenic Walkway’ map and info sign, this walk heads across the grass following the coast line, keeping the water to the left and heading towards the “Ellery’s Punt Reserve” sign. From the sign, the walk passes under the Spit Bridge and then up the flight of stairs that come to the end of Battle Boulevard.
Continue straight: From the end of the cul-de-sac, this walk follows Battle Bvd up the road to the car park just near the intersection with Manly Road.
Continue straight: From the end of the cul-de-sac, this walk follows Battle Bvd up the road to the car park just near the intersection with Manly Road.
Maps for the Balmoral Beach to The Spit walk
You can download the PDF for this walk to print a map.
These maps below cover the walk and the wider area around the walk, they are worth carrying for safety reasons.
| Parramatta River | 1:25 000 Map Series | 91303N PARRAMATTA RIVER | NSW-91303N |
| Sydney Heads | 1:25 000 Map Series | 91302N SYDNEY HEADS | NSW-91302N |
| Sydney | 1:100 000 Map Series | 9130 SYDNEY | 9130 |
Cross sectional view of the Balmoral Beach to The Spit bushwalking track
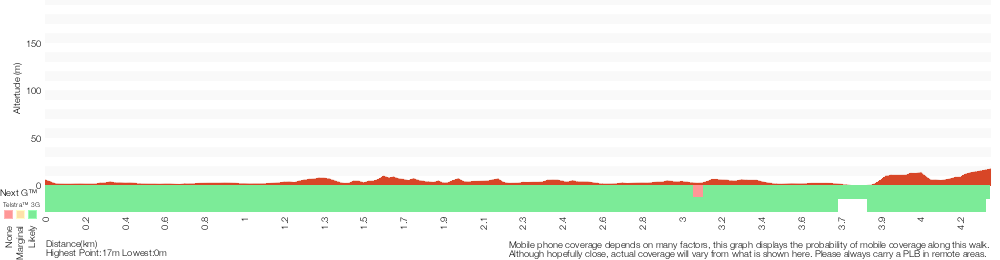
Analysis and summary of the altitude variation on the Balmoral Beach to The Spit
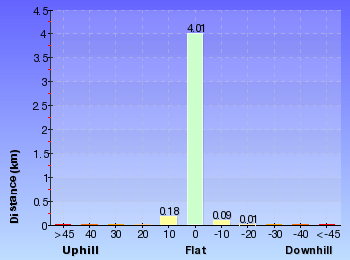
Overview of this walks grade – based on the AS 2156.1 – 2001
Under this standard, a walk is graded based on the most difficult section of the walk.
| Length | 4.3 km | ||
| Time | 2 hrs 30 mins | ||
| . | |||
| Grade 4/6 Hard track |
AS 2156.1 | Gradient | Very steep (4/6) |
| Quality of track | Rough track, where fallen trees and other obstacles are likely (4/6) | ||
| Signs | Minimal directional signs (4/6) | ||
| Experience Required | Moderate level of bushwalking experience recommended (4/6) | ||
| Weather | Storms may impact on navigation and safety (3/6) | ||
| Infrastructure | Limited facilities, not all cliffs are fenced (3/6) |
Some more details of this walks Grading
Here is a bit more details explaining grading looking at sections of the walk
Gradient
1.8km of this walk is flat with no steps and another 1.7km is very steep. Whilst another 720m has gentle hills with occasional steps and the remaining 90m has short steep hills.
Quality of track
1.7km of this walk follows a rough track, where fallen trees and other obstacles are likely and another 950m follows a smooth and hardened path. Whilst another 860m follows a clear and well formed track or trail and the remaining 790m follows a formed track, with some branches and other obstacles.
Signs
1.8km of this walk is clearly signposted and another 1.7km has minimal directional signs. The remaining (790m) has directional signs at most intersection.
Experience Required
Around 2.6km of this walk requires no previous bushwalking experience, whilst the remaining 1.7km requires a leader a with moderate level of bushwalking experience.
weather
Around 2.6km of this walk is not usually affected by severe weather events (that would unexpectedly impact safety and navigation), whilst the remaining 1.7km is affected by storms that may impact your navigation and safety.
Infrastructure
Around 2.6km of this walk is close to useful facilities (such as fenced cliffs and seats), whilst the remaining 1.7km has limited facilities (such as not all cliffs fenced).
Similar walks
A list of walks that share part of the track with the Balmoral Beach to The Spit walk.
3.6 km Circuit
1 hr 30 mins
Hard track
6.1 km One way
2 hrs 30 mins
Hard track
6.8 km One way
3 hrs
Hard track
8.7 km Circuit
4 hrs
Moderate track
9.1 km One way
3 hrs 45 mins
Moderate track
10.4 km One way
5 hrs
Hard track
13.7 km One way
5 hrs 45 mins
Moderate track
18.9 km One way
8 hrs
Hard track
22.6 km One way
9 hrs 45 mins
Hard track
Other Nearby walks
A list of walks that start near the Balmoral Beach to The Spit walk.
3.9 km Circuit
2 hrs
Hard track
1.9 km Circuit
1 Hr
Moderate track
904 m Return
30 mins
Easy track
930 m Return
30 mins
Hard track
762 m Return
30 mins
Moderate track
664 m Return
30 mins
Easy track
4.9 km Circuit
2 hrs 30 mins
Moderate track
144 m Return
7 mins
Very easy
842 m Return
30 mins
Moderate track
1.7 km Return
1 Hr
Moderate track
548 m Circuit
20 mins
Moderate track
200 m Return
30 mins
Moderate track
Plan your trip to and from the walk here
The Balmoral Beach to The Spit walk starts at the Balmoral Park car park (gps: -33.829056, 151.25567)
Your transport options to Balmoral Park car park are by;
![]() Bus. (get details)
Bus. (get details)
![]() Car. There is free parking available.
Car. There is free parking available.
(get details)
The Balmoral Beach to The Spit ends at the Int. Battle Boulevard and Manly Rd (gps: -33.800405, 151.24678)
Your transport options to Int. Battle Boulevard and Manly Rd are by;
![]() Bus. (get details)
Bus. (get details)
![]() Car. There is free parking available.
Car. There is free parking available.
(get details)
Short URL = http://wild.tl/bbtts
Gallery images
There are other downloads I am still working on.
You will probably need to login to access these — still all free.
* KML (google earth file)
* GPX (GPS file)
Special Maps/ brochures
* A3 topo maps
* PDF with Lands Topo map base
* PDF with arial image (and map overlay)
I wanted to get the main site live first, this extra stuff will come in time.
Happy walking
Matt 🙂
Grotto Point Lighthouse Walk
And Walk
Grotto Point Lighthouse Walk

1 Hr
1.7 km Return
83 m
Moderate track
This is an excellent walk with some very scenic views. The walk travels along a well used track through the thick coastal bush. The views are capped off by the vista over Sydney Harbour from the Grotto Point Lighthouse. Easy parking, a few good side trips, and in particular, the Aboriginal Engravings, make this walk all the more appealing.


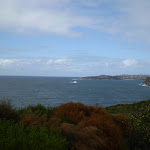


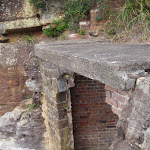
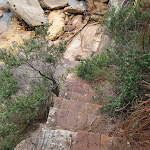
(0km) End of Cutler Road → Grotto Point Engravings track
170 m
4 mins
0m
-18m
Moderate track
From the car park at the end of Cutler Road, the walk heads between a gap in the fence, down the rock steps towards the water. The track soon passes an information sign before continuing down to the intersection with the Arabanoo Walk.
Turn right: From the intersection, this walk follows the ‘Castle Rock Beach 800m’ sign along the bush track and down the stone steps, keeping the ocean to the left. The track winds down the hill until it flattens out at the intersection with a short track (heading to the Grotto Point engravings track) on the left.
Turn right: From the intersection, this walk follows the ‘Castle Rock Beach 800m’ sign along the bush track and down the stone steps, keeping the ocean to the left. The track winds down the hill until it flattens out at the intersection with a short track (heading to the Grotto Point engravings track) on the left.
(0.17km) Grotto Point Engravings track → Grotto Point Engravings
40 m
1 mins
2m
0m
Moderate track
Continue straight: From the intersection, this walk heads down the hill, beside a wooden sleeper, passing an engraving of a kangaroo on the right. The short track soon comes to a large rock platform with the rest of the engravings, and information signs. At the end of this side trip, retrace your steps back to the main walk then Turn left.
Grotto Point Engravings

The engravings at Grotto Point depict kangaroos, fish and what appears to be boomerangs. The engravings are in quite good condition, considering their age. We have already lost so much of this region’s history that historians are not entirely sure if this is the land of the Gayamagal or the Cammeraygal clan. Please take a great deal of care at this site to ensure the longevity of this history. More info.
(0.17km) Grotto Point Engravings track → Int of Grotto Point Lighthouse and Manly to Spit tracks
110 m
3 mins
1m
-8m
Moderate track
Turn right: From the intersection, this walk follows the bush track heading down the hill, away from the engravings. The track soon heads down some rock step to the signposted intersection of the Grotto Point Lighthouse track.
(0.28km) Int of Grotto Point Lighthouse and Manly to Spit tracks → Int of Grotto Point Lighthouse and Grotto Point Cliffs tracks
140 m
3 mins
2m
-13m
Moderate track
Turn left : From the intersection, this walk follows the Grotto Point Lighthouse arrow along the rocky bush track, winding down a gentle hill, coming into more dense bush as it winds to the intersection of the Grotto Point Lighthouse and the Grotto Point Cliffs tracks.
(0.42km) Int of Grotto Point Lighthouse and Grotto Point Cliffs tracks → Grotto Point Cliffs
100 m
2 mins
0m
-18m
Moderate track
Veer left: From the intersection, this walk heads past the blank (but graffiti-covered) sign and along the rocky track, winding down the hill towards the northern edge of the ridge, soon coming to the top of the cliffs. At the end of this side trip, retrace your steps back to the main walk then Turn left.
(0.42km) Int of Grotto Point Lighthouse and Grotto Point Cliffs tracks → Grotto Point Lighthouse
420 m
8 mins
2m
-39m
Moderate track
Veer right: From the intersection, this walk winds down the hill, passing an old, blank signpost. The track wanders through dense bush and along the ridge, flattening out for a while until it drops down another hill towards the end of the point, coming to the Grotto Point Lighthouse.
Grotto Point Lighthouse
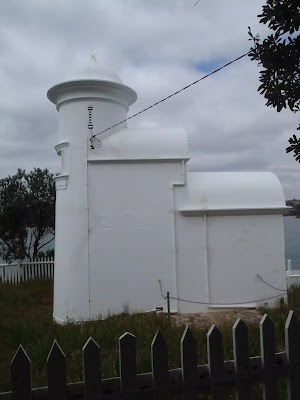
Surrounded by a white picket fence, the small Grotto Point Lighthouse overlooks Middle Head. The light was designed in the early 1900s by the architect Maurice Festu to assist ships entering the harbour. Construction started in 1910, with the lighthouse being commissioned on September 1 1911.
(0.83km) Grotto Point lighthouse → Old concrete bunker
50 m
1 mins
1m
-2m
Moderate track
Turn right: From the intersection, this walk heads around the right-hand side of the lighthouse and along the bush track, passing a green post and continuing down some tall brick steps to the concrete roof of an old bunker. At the end of this side trip, retrace your steps back to the main walk then Turn sharp left.
Maps for the Grotto Point Lighthouse Walk walk
You can download the PDF for this walk to print a map.
These maps below cover the walk and the wider area around the walk, they are worth carrying for safety reasons.
| Sydney Heads | 1:25 000 Map Series | 91302N SYDNEY HEADS | NSW-91302N |
| Sydney | 1:100 000 Map Series | 9130 SYDNEY | 9130 |
Cross sectional view of the Grotto Point Lighthouse Walk bushwalking track
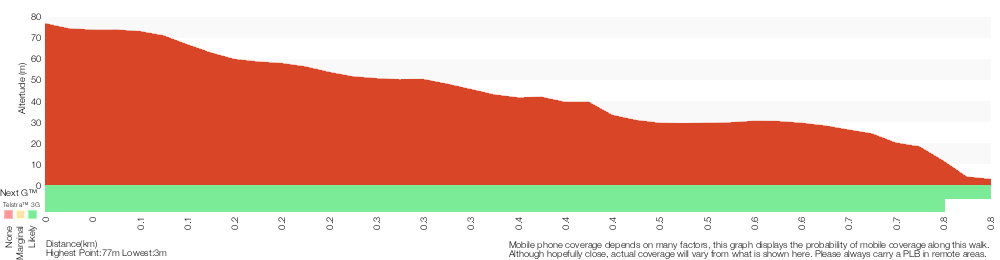
Analysis and summary of the altitude variation on the Grotto Point Lighthouse Walk
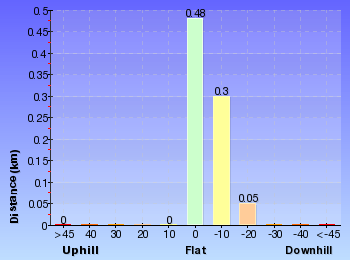
Overview of this walks grade – based on the AS 2156.1 – 2001
Under this standard, a walk is graded based on the most difficult section of the walk.
| Length | 1.7 km | ||
| Time | 1 Hr | ||
| . | |||
| Grade 3/6 Moderate track |
AS 2156.1 | Gradient | Short steep hills (3/6) |
| Quality of track | Formed track, with some branches and other obstacles (3/6) | ||
| Signs | Directional signs along the way (3/6) | ||
| Experience Required | Some bushwalking experience recommended (3/6) | ||
| Weather | Weather generally has little impact on safety (1/6) | ||
| Infrastructure | Limited facilities, not all cliffs are fenced (3/6) |
Some more details of this walks Grading
Here is a bit more details explaining grading looking at sections of the walk
Gradient
Around 590m of this walk has gentle hills with occasional steps, whilst the remaining 250m has short steep hills.
Quality of track
Around 700m of this walk follows a formed track, with some branches and other obstacles, whilst the remaining 140m follows a clear and well formed track or trail.
Signs
Around 700m of this walk has directional signs at most intersection, whilst the remaining 140m is clearly signposted.
Experience Required
Around 550m of this walk requires some bushwalking experience, whilst the remaining 280m requires no previous bushwalking experience.
weather
This whole walk, 830m is not usually affected by severe weather events (that would unexpectedly impact safety and navigation).
Infrastructure
Around 590m of this walk is close to useful facilities (such as fenced cliffs and seats), whilst the remaining 250m has limited facilities (such as not all cliffs fenced).
Similar walks
A list of walks that share part of the track with the Grotto Point Lighthouse Walk walk.
2 km Return
1 Hr
Moderate track
3.6 km Return
2 hrs
Moderate track
8.7 km Circuit
4 hrs
Moderate track
9.1 km One way
3 hrs 45 mins
Moderate track
13.7 km One way
5 hrs 45 mins
Moderate track
18.9 km One way
8 hrs
Hard track
Other Nearby walks
A list of walks that start near the Grotto Point Lighthouse Walk walk.
200 m Return
30 mins
Moderate track
60 m Return
3 mins
Moderate track
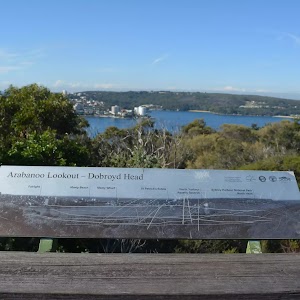
142 m Return
15 mins
Very easy

2.5 km Circuit
1 Hr
Hard track
3.6 km Circuit
1 hr 30 mins
Hard track
930 m Return
30 mins
Hard track
762 m Return
30 mins
Moderate track
664 m Return
30 mins
Easy track
1.9 km Circuit
1 Hr
Moderate track
22.6 km One way
9 hrs 45 mins
Hard track
6.1 km One way
2 hrs 30 mins
Hard track
3.9 km Circuit
2 hrs
Hard track
Plan your trip to and from the walk here
The Grotto Point Lighthouse Walk walk starts and ends at the End of Cutler Road (gps: -33.812616, 151.26351)
Your transport options to End of Cutler Road are by;
![]() Bus. (get details)
Bus. (get details)
![]() Car. There is free parking available.
Car. There is free parking available.
(get details)
Short URL = http://wild.tl/gplxx
Gallery images
There are other downloads I am still working on.
You will probably need to login to access these — still all free.
* KML (google earth file)
* GPX (GPS file)
Special Maps/ brochures
* A3 topo maps
* PDF with Lands Topo map base
* PDF with arial image (and map overlay)
I wanted to get the main site live first, this extra stuff will come in time.
Happy walking
Matt 🙂
Taronga Wharf to Chowder Bay
And Walk
Taronga Wharf to Chowder Bay

2 hrs
4.4 km One way
246 m
Moderate track
Starting at Taronga Wharf, this walk passes many icons of Sydney, including Taronga Zoo, HMAS Sydney Mast, Chowder Bay. The walk also provides views across the water to the Harbour Bridge, Opera House, Fort Denison and the city skyline. The walk has many brilliant vantage points over the harbour with some spots to stop for a coffee and lunch. A great walk to see Sydney Harbour from a different view.
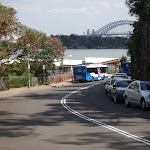


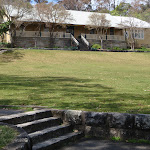
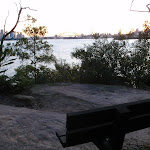
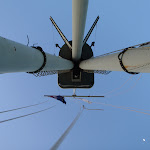
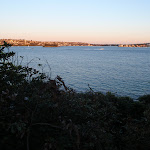
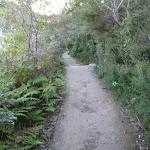

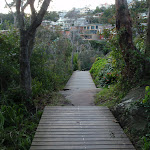


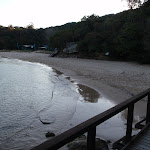

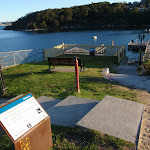
(0km) Taronga Zoo Wharf → Taronga Zoo Entrance
220 m
4 mins
11m
-5m
Very easy
From the wharf, the walk heads uphill along the footpath beside the road to the Taronga Zoo entrance at the pedestrian crossing.
Taronga Zoo
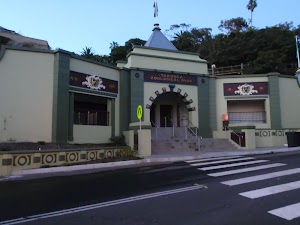
Taronga Zoo was founded in 1916, with the vision of imitating the Hamburg Zoo’s bar-less exhibits. Since its opening, Taronga Zoo has directed more attention to research, education and conservation efforts to support the animals. Taronga Zoo is open everyday 9am- 5pm. Phone: +61 2 9969 2777 or email: [email protected]. More info.
(0.22km) Taronga Zoo Entrance → Int. Borogegal Walking Trail and Athol Hall Trk
410 m
9 mins
24m
-15m
Moderate track
Turn right: From the opposite the zoo entrance, the walk heads down the ramp leaving the road up to the left. The track soon leads to a a lookout with a set of bench seats and good harbour views. The walk continues along the footpath to a wire fence then follows the ‘Walking Track’ sign along the hillside to climb a few steps and cross a wooden bridge. The track comes to the corner of Athol Hall’s grass clearing.
Veer right: From the intersection, the walk heads down the stairs then continues along the hill for a short time. The walk descends more stairs to a signposted intersection.
Veer right: From the intersection, the walk heads down the stairs then continues along the hill for a short time. The walk descends more stairs to a signposted intersection.
(0.63km) Int. Borogegal Walking Trail and Athol Hall Trk → Athol Hall
70 m
2 mins
9m
0m
Moderate track
Turn left : From the intersection, this walk follows the sign to ‘Athol Hall’ up the stairs, crossing a large grassy area. The walk then continues up to Athol Hall entrance. At the end of this side trip, retrace your steps back to the main walk then Veer left.
Athol Hall

Athol Hall, built in 1908, was once a hotel. Sections of the original building date back to the 1800’s. The hall has an excellent vantage point over the harbour with the Sydney Opera House, Harbour Bridge and city all well within its scope. Athol Hall today is a cafe and function centre with the cafe open Tues-Fri and Sun, 11am -3pm. More info.
(0.63km) Int. Borogegal Walking Trail and Athol Hall Trk → HMAS Sydney Mast, Bradleys Head
670 m
16 mins
31m
-40m
Easy track
Continue straight: From the stairs, this walk heads around the hillside with the harbour below on the right. The walk travels across large sections of boardwalk which undulate slightly as the walk comes up to a trail (which leads to a bench overlooking Sydney Harbour). From the trail, this walk keeps contouring along the hillside, south and tending left, to the intersection, signposted as the way to ‘Cannons picnic area’.
Continue straight: From the intersection, this walk heads towards the car park, keeping the harbour to the right. The walk leads approximately 10m to the intersection with a track (leading down to Bradleys Head Amphitheatre).
Veer left: From the intersection, this walk heads along the footpath next to the car park for a short distance, until it comes to be above the flag pole, HMAS Sydney Mast.
HMAS Sydney Memorial Mast

The HMAS Sydney Memorial Mast was erected in 1934, following the HMAS Sydney’s decommissioning in 1928. The mast stands as a sign of respect for ‘Australian officers, sailors and ships lost at sea and in combat’[2]. HMAS Sydney itself was a Chatham Class light cruiser which saw action in WW1.
More info.
More info.
(1.3km) HMAS Sydney Mast, Bradleys Head → Int. Borogegal Walking Trail and Taylors Bay Lookout track
790 m
17 mins
42m
-29m
Easy track
Continue straight: From the intersection, this walk heads along the footpath, keeping the road to the left, for about 150m to where the road bends sharply left. From this point, this walk heads along boardwalk, on your right, keeping the water glimpses to your right. The board walk soon end and this walk follows the track along the side of the hill for about 600m to come to an intersection with a sign pointing back to ‘Bradleys Head’.
(2.09km) Int. Borogegal Walking Trail and Taylors Bay Lookout track → Taylors Bay Lookout
50 m
1 mins
0m
-6m
Moderate track
Turn right: From the intersection, the walk heads away from the main tracks winding into the bush. The track winds past two white benches, to a small rock shelf overlooking the water. At the end of this side trip, retrace your steps back to the main walk then Turn right.
(2.09km) Int. Borogegal Walking Trail and Taylors Bay Lookout track → Int. End of Iluka Rd access and Borogegal Trks
680 m
17 mins
41m
-51m
Moderate track
Continue straight: From the intersection, this walk heads into Taylors Gully, with Taylors Bay below on the right. The track continues for approximately 300m, contouring around the hill with views of Taylors Bay on the right. Tending right, this walk enters and exits Taylors Gully, to continue approximately 250m to the signposted intersection at the beginning of the houses, on the left.
(2.77km) Taylors intersection → Chowder Head track intersection
570 m
14 mins
47m
-30m
Moderate track
Continue straight: From the intersection, the walk heads along the line of the houses, on the left, for approximately 140m. The track passes a Japanese Submarine information sign on the right as it continues along sections of boardwalk track, to the intersection next to the last house. The walk heads up the stairs below the last house to be met by a large sandstone staircase on the left and a track to the front.
Continue straight: From the intersection, this walk heads away from the house and clearing along the fairly flat track keeping the water glimpses to your right. The path soon leads to a clear three-way intersection with a ‘Ashton Park’ sign pointing back along the track.
Continue straight: From the intersection, this walk heads away from the house and clearing along the fairly flat track keeping the water glimpses to your right. The path soon leads to a clear three-way intersection with a ‘Ashton Park’ sign pointing back along the track.
(3.33km) Chowder Head track intersection → Chowder Head
90 m
2 mins
0m
-10m
Moderate track
Turn right: From the intersection, this walk follows the ‘Chowder Head’ sign[3] south-west along the clear track. The track heads gently downhill and bends left past some dead gums[4] to find an unfenced rock platform with great harbour views[5]. (Note the informal track continues down becoming steeper, leading to a small bay.) At the end of this side trip, retrace your steps back to the main walk then Veer right.
Chowder Head
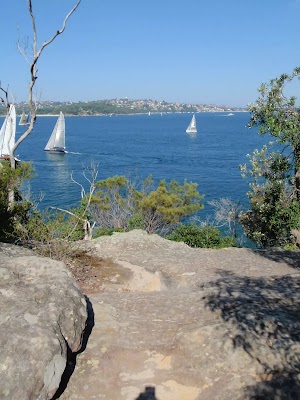
Chowder Head provides a small unfenced rocky outcrop to enjoy the wide harbour views. From this vantage point, there are views across the water to South Head, Vaucluse, Rose Bay, Shark Island and Bradleys Head. A great spot to watch the sailing boats on a clear day.
(3.33km) Chowder Head track intersection → Bottom of Morella Rd track
110 m
2 mins
12m
-2m
Easy track
(3.44km) Bottom of Morella Rd track → Morella St lookout
170 m
4 mins
3m
-14m
Moderate track
Veer left: From the intersection, this walk follows the main track keeping the water glimpses to your right (and the Morella Rd track to your left). The track gently works is way around the hill to come to a sign point back to ‘Ashton Park’ and a large clearing with good views behind some houses.

(3.61km) Morella St lookout → Bottom of Sarahs walk steps
80 m
3 mins
0m
-17m
Easy track
Turn right: From the intersection, this walk follows ‘Clifton Gardens’ sign[10] downhill along the concrete path, behind the line of houses[11]. The path leads down the hill, following a series of steps[12] past a bench seat to come to a ‘T’ intersection (with Sarah’s Walk, part way down a set of steps)[13][14].
(3.68km) Bottom of Sarahs walk steps → Clifton Gardens baths
250 m
5 mins
3m
-16m
Moderate track
Turn right: From the intersection, this walk heads down the steps[15] that soon flatten out as the footpath leads around the headland under a few sandstone overhangs[16]. The walk soon comes to a ‘Foreshore Path’[17] sign pointing back along the path at the south-western end of Clifton Gardens.
Turn right: From the intersection, this walk heads down onto the beach, towards the wharf in the middle of the beach. The walk passes an Illawarra Flame tree, as it heads approximately 100m along the beach to the start of the wharf.
Turn right: From the intersection, this walk heads down onto the beach, towards the wharf in the middle of the beach. The walk passes an Illawarra Flame tree, as it heads approximately 100m along the beach to the start of the wharf.
Clifton Gardens Reserve

Clifton Gardens was developed as a picnic spot in the late 1800s, with a local hotelier building a wharf and dance pavilion. In 1909, Sydney Ferries Ltd purchased the estate, and further developed the area, including a large swimming enclosure. The structure burned down in 1956.
Today, Clifton Gardens is touted as ‘remnant bushland’, offering birdwatching, a netted swimming enclosure, change rooms, a fenced playground[20], and of course, spectacular views over Chowder Bay. A short bush track leads through to Rawson Oval.
Today, Clifton Gardens is touted as ‘remnant bushland’, offering birdwatching, a netted swimming enclosure, change rooms, a fenced playground[20], and of course, spectacular views over Chowder Bay. A short bush track leads through to Rawson Oval.
(3.94km) Clifton Gardens Baths → Chowder Bay Lower Gate
210 m
5 mins
13m
-10m
Moderate track
Continue straight: From the wharf, this walk heads towards the playground-end of the beach. The walk leads along the beach, passing the playground and rocky outcrop on the left to tend right onto a boardwalk. The boardwalk takes the walk to the lower gate of Chowder Bay.
Bacino Kiosk

The Bacino Kiosk, just next to Clifton Gardens, is a smaller version of the Bacino Bar above at Chowder Bay. This kiosk supplies passers-by with a home-blend coffee and sandwiches, and all at a reasonable price ($5-12). The Kiosk is open from 7am-4pm every day, except Christmas and bad weather. More info.
(4.14km) Chowder Bay Lower Gate → Roundabout at end of Chowder Bay Road
230 m
4 mins
19m
-5m
Moderate track
Continue straight: From the gate, this walk heads towards the wharf approximately 80m away. The walk soon passes Bacino Kiosk on the left, and continues along the foreshore footpath to the start of the wharf.
Turn left: From the wharf, this walk heads directly away from that wharf, heading up the stairs. At the top of the stairs, this walk follows the footpath right, around a flag pole and house on the left. The walk continues past a round-about, to the start of a car park, opposite Bacino Bar.
Turn left: From the wharf, this walk heads directly away from that wharf, heading up the stairs. At the top of the stairs, this walk follows the footpath right, around a flag pole and house on the left. The walk continues past a round-about, to the start of a car park, opposite Bacino Bar.
Chowder Bay
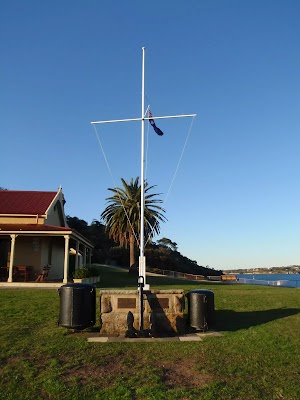
Chowder Bay looks over Sydney Harbour, to Vaucluse and Rose Bay. The bay is named after the food of the American whalers stationed at Clifton Gardens, ‘clam chowder’. Chowder Bay then became a Submarine Mining Depot in 1889. Today, Chowder Bay still has great views from the remaining military buildings on the hillside. One of the newer buildings houses a cafe, and other buildings stand as monuments to their former use. Chowder Bay offers great views with easy access to Clifton Gardens for a swim.
Bacino Cafe
The Bacino Bar is in Building No.2 at Chowder Bay, with great views across Sydney Harbour. The bar sells pastas, panini, arancini, tramezzini, stuffed eggplant and biscotti, along with homemade sandwiches and treats. The Bacino Bar prices are reasonable, ranging between $5-12 for the delicacies, and their coffee is made of their own blend. The bar is open every day from 7am- 4pm except for Christmas. A public toilet is available at the Eastern end of the building. More info.
Maps for the Taronga Wharf to Chowder Bay walk
You can download the PDF for this walk to print a map.
These maps below cover the walk and the wider area around the walk, they are worth carrying for safety reasons.
| Parramatta River | 1:25 000 Map Series | 91303N PARRAMATTA RIVER | NSW-91303N |
| Sydney Heads | 1:25 000 Map Series | 91302N SYDNEY HEADS | NSW-91302N |
| Sydney | 1:100 000 Map Series | 9130 SYDNEY | 9130 |
Cross sectional view of the Taronga Wharf to Chowder Bay bushwalking track
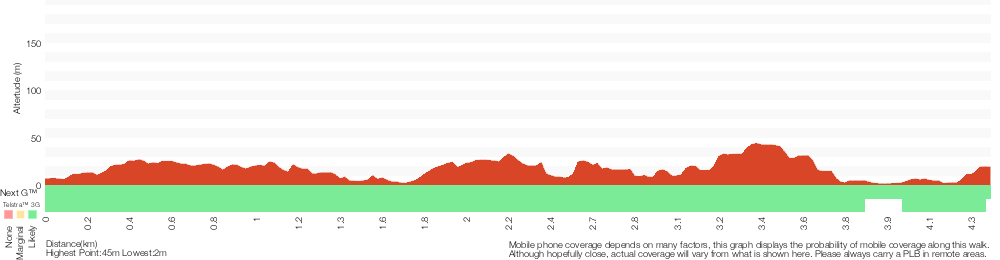
Analysis and summary of the altitude variation on the Taronga Wharf to Chowder Bay
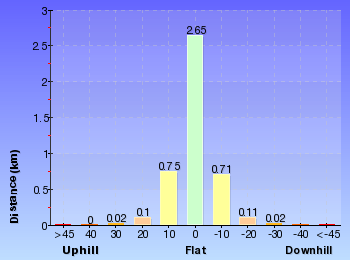
Overview of this walks grade – based on the AS 2156.1 – 2001
Under this standard, a walk is graded based on the most difficult section of the walk.
| Length | 4.4 km | ||
| Time | 2 hrs | ||
| . | |||
| Grade 3/6 Moderate track |
AS 2156.1 | Gradient | Short steep hills (3/6) |
| Quality of track | Formed track, with some branches and other obstacles (3/6) | ||
| Signs | Directional signs along the way (3/6) | ||
| Experience Required | No experience required (1/6) | ||
| Weather | Weather generally has little impact on safety (1/6) | ||
| Infrastructure | Limited facilities, not all cliffs are fenced (3/6) |
Some more details of this walks Grading
Here is a bit more details explaining grading looking at sections of the walk
Gradient
1.8km of this walk has gentle hills with occasional steps and another 1.4km has short steep hills. The remaining (1.1km) is flat with no steps.
Quality of track
2km of this walk follows a formed track, with some branches and other obstacles and another 1.7km follows a smooth and hardened path. The remaining (630m) follows a clear and well formed track or trail.
Signs
Around 3.8km of this walk is clearly signposted, whilst the remaining 620m has directional signs at most intersection.
Experience Required
This whole walk, 4.4km requires no previous bushwalking experience.
weather
This whole walk, 4.4km is not usually affected by severe weather events (that would unexpectedly impact safety and navigation).
Infrastructure
Around 3.5km of this walk is close to useful facilities (such as fenced cliffs and seats), whilst the remaining 850m has limited facilities (such as not all cliffs fenced).
Similar walks
A list of walks that share part of the track with the Taronga Wharf to Chowder Bay walk.
548 m Circuit
20 mins
Moderate track
1.7 km Return
1 Hr
Moderate track
1.7 km Circuit
1 Hr
Moderate track
2.8 km One way
1 hr 30 mins
Moderate track
3 km Circuit
1 hr 30 mins
Moderate track
3.7 km One way
1 hr 45 mins
Moderate track
6.5 km Circuit
3 hrs 30 mins
Moderate track
6.8 km One way
3 hrs
Hard track
7 km Circuit
3 hrs
Moderate track
10.4 km One way
5 hrs
Hard track
18.9 km One way
8 hrs
Hard track
Other Nearby walks
A list of walks that start near the Taronga Wharf to Chowder Bay walk.
1.7 km One way
1 Hr
Moderate track
930 m Return
30 mins
Moderate track
2.7 km Circuit
1 hr 15 mins
Easy track
2 km One way
45 mins
Easy track
4.2 km One way
1 hr 45 mins
Moderate track
478 m Return
15 mins
Easy track
9.8 km One way
4 hrs
Moderate track
842 m Return
30 mins
Moderate track
4.9 km Circuit
2 hrs 30 mins
Moderate track
144 m Return
7 mins
Very easy
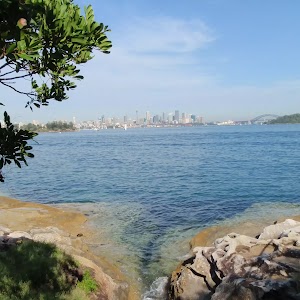
2.2 km One way
1 Hr
Moderate track
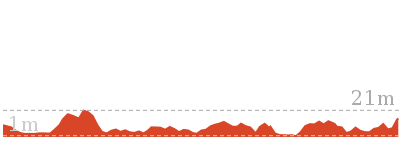
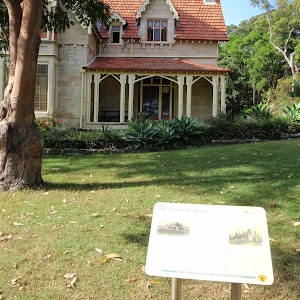
896 m Return
20 mins
Easy track
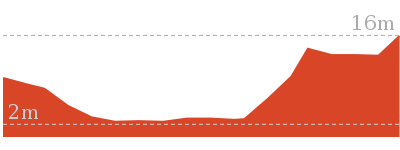
Plan your trip to and from the walk here
The Taronga Wharf to Chowder Bay walk starts at the Taronga Zoo Wharf (gps: -33.845752, 151.23978)
Your transport options to Taronga Zoo Wharf are by;
![]() Ferry. (get details)
Ferry. (get details)
![]() Bus. (get details)
Bus. (get details)
![]() Car. There is free parking available.
Car. There is free parking available.
(get details)
The Taronga Wharf to Chowder Bay ends at the Roundabout at end of Chowder Bay Road (gps: -33.838398, 151.25606)
Your transport options to Roundabout at end of Chowder Bay Road are by;
![]() Bus. (get details)
Bus. (get details)
![]() Car. There is free parking available.
Car. There is free parking available.
(get details)
Short URL = http://wild.tl/twtcb
Gallery images
There are other downloads I am still working on.
You will probably need to login to access these — still all free.
* KML (google earth file)
* GPX (GPS file)
Special Maps/ brochures
* A3 topo maps
* PDF with Lands Topo map base
* PDF with arial image (and map overlay)
I wanted to get the main site live first, this extra stuff will come in time.
Happy walking
Matt 🙂
Comments